Friday, November 13, 2020

Grand Staircase Escalante Sundry Hikes


With the 2020 summer hiking season having not worked out at all as I had planned (no Peru trip, no Corsica trip owing to covid, no Sierra High Route owing to fires) and the airwaves full of depressing covid, vaccine, and politics noise, I decided to go out one more time for a good long time. I headed to the Grand Staircase Escalante area in Southern Utah. The plan was to do a bunch of 3-8 day hikes in this area and as well as to scope out some details for a Hayduke hike I am considering for Spring 2021.

Boulder Mail Trail


This route connects Boulder, UT with Escalante, UT across the slickrock bench separating the two towns, crossing two major drainages along the way, the most significant being Death Hollow (see below). I read somewhere that the preferred way of doing this was from Boulder to Escalante as this was mostly going to be downhill. There is something to it, but there is a fair amount of climbing and descending to do regardless.

I tried to get a ride to Boulder with printed sign in hand from downtown Escalante and had absolutely no luck. It was as if people feared I’d be carrying some form of pestilence. How could that possibly be in Spring 2020?

Next morning I had better luck catching a ride from Hole in the Rock road. I was not exactly sure where I had to get off the highway and my hosts dropped me off much farther along than I needed to be. I hiked back along along the highway, back onto the bench. There is a road leading to Salt Gulch and Hells Backbone right around the Mile 93 marker. Take that, then take the first dirt road on your left for about 500 yds, cross the airfield (look to your left first) and you find yourself at the trail head.


         Maybe this person should try lightweight backpacking and leave the kitchen sink at home

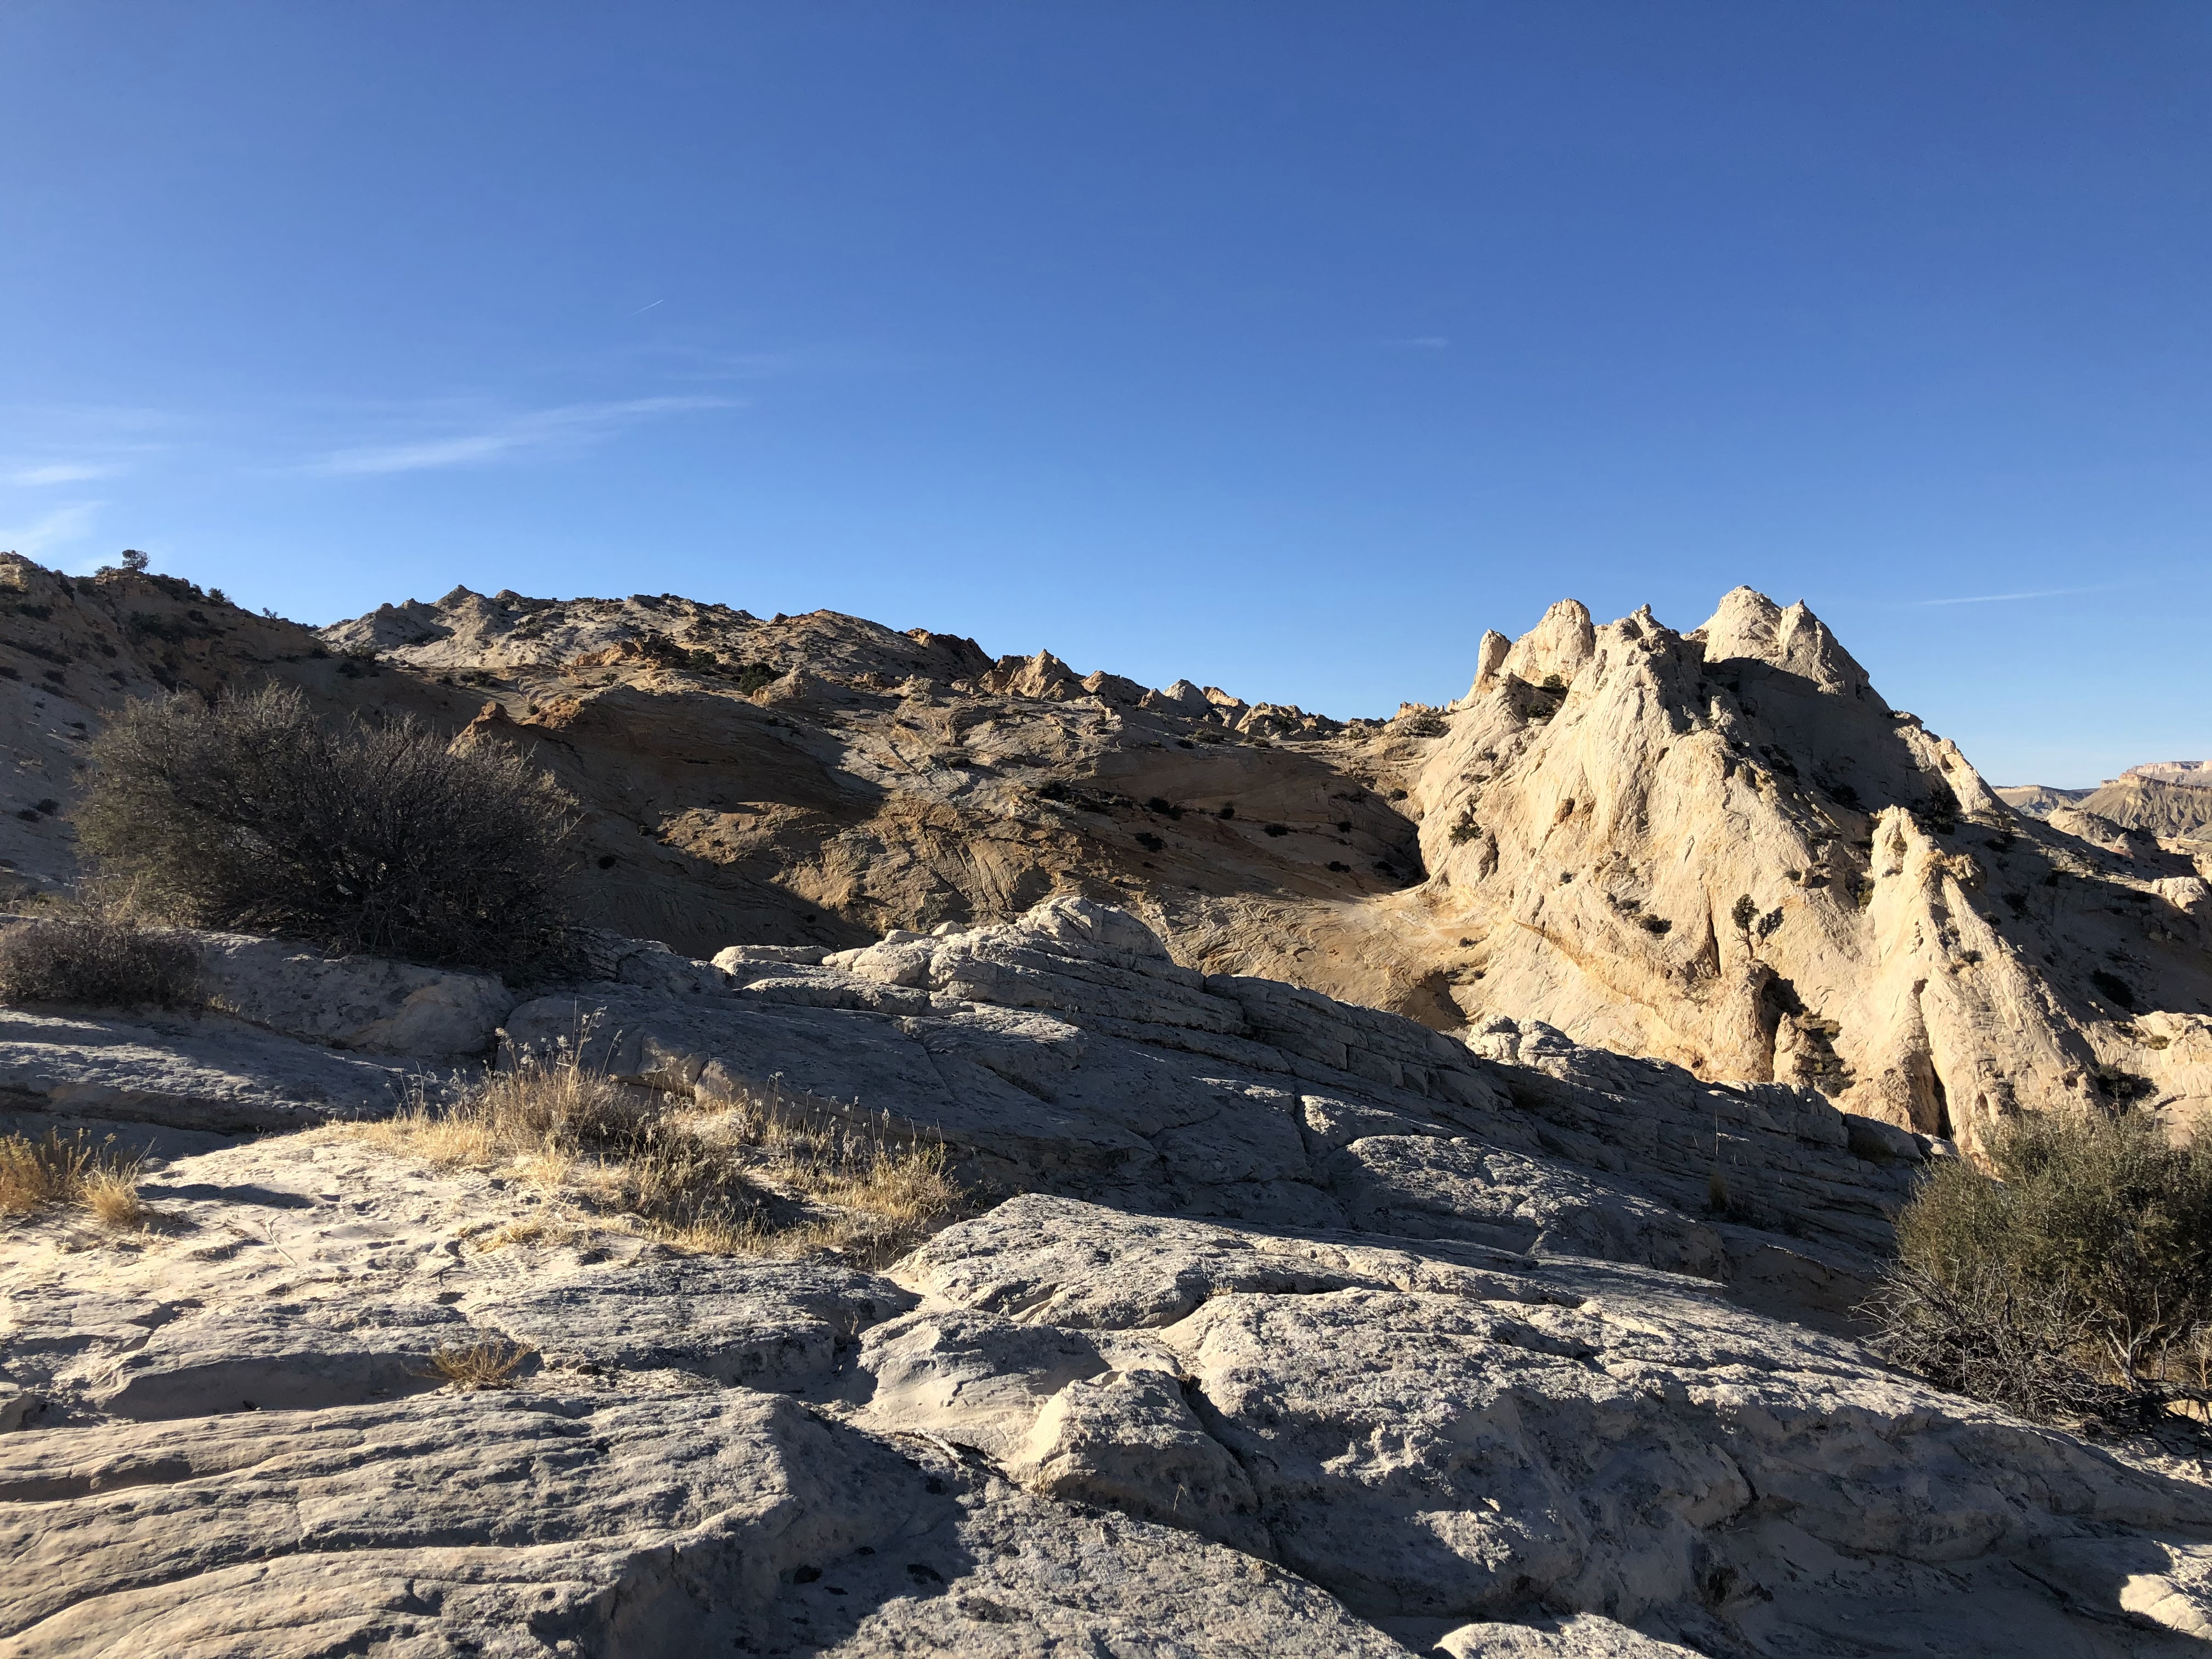
The single trail is somewhat ho-hum at first, but as you reach the Sweetwater Creek drainage it gets more interesting. You descend a minor slickrock face, cross the creek and work your way around a ridge. Here I camped for the night under a bunch of pinions and continued next morning on slickrock and through deep sandy stretches to reach the top of the cliff overlooking Death Hollow. 

    At the top of the descent to Death Hollow
 

The excellently cairned route down to the creek has significant exposure and is not for those who are afraid of heights. It’s not as if you’d be falling straight off the cliff some 600 ft to your death, instead you’d be doing two or three bounces on your way down. The end result would be the same though.


        Top photo: Descent to Death Hollow viewed from the bottom. Note the two trees in the center          on the horizon. Bottom photo: Enlargement of the area around the two trees in the upper photo. For scale note the hiker immediately below the trees.

The ledges and ramps you walk are typical single track width or slightly wider, so no special acrobatics are required, but you would positively not want to stumble.

At the bottom you enter a shady oasis right by the side of the creek where you can take a rest before heading downstream to the location where the trail continues up the other side. This spot, another shady oasis, is marked by cairns and the trail climbs much less steeply and much more quickly out of the Death Hollow drainage. After some slick rock walking you again make your way through deep sand to a slickrock bench above Mamie Creek. I spent the night there in a little hollow  in the slickrock shielded from the wind by a pinion tree. As I was having breakfast Andrew Skurka passed by with a client group, headed for Death Hollow and the Escalante river.


                    Above Mamie Creek
 

All along the way the trail runs along or crosses a telephone wire that connected Escalante Town and Boulder. This must have been some operation installing this thing and getting the wire across the Death Hollow drainage with its steep walls.

            Can you spot the porcellain insulator affixed to the tree and the telephone wire?(Look closely at the bare branch in the center of the picture.)
 

The descent to (dry) Mamie creek is steep but easy. You then hit a stretch of deep sand, followed by another slickrock wonderland, more sand and suddenly find yourself at the edge of the bench above Escalante. The descent is steep slickrock first and then a somewhat tedious stretch of trail where you have to watch your feet. Once you are down the slope you end up on a cairned trail that leads you to the Escalante river trailhead at the East end of town by the cemetery and the Hole in the Rock heritage site.

        Meadows and pastures around Escalante town, "Hole in the Rock" indeed


Two and a half glorious days with blue skies, temperatures in the sixties during the day and in the forties at night. Highly recommended.


Harris canyon - Fence canyon - Escalante - Harris canyon loop with side trip to Golden Cathedral/Neon canyon and Ringtail slot canyon


When I first learned about the Escalante National Monument on Jamal Green’s “AcrossUtah!” site I had read about the Golden Cathedral and Neon canyon as worthwhile destinations to visit. This year was going to be the time. I envisaged a round trip of some kind rather than an in-and-out type of trip. I settled on starting at the Harris canyon trailhead, making my way across the Buckaroo flat and the Allen Dump to the Egypt trailhead. From there I would be descending Fence canyon, head downstream to the Ringtail slot canyon, then to Neon canyon /Golden Cathedral. Heading up the Escalante river to the Harris canyon junction and up that canyon back to the trailhead.

On Google Earth I studied the flat comprising Buckaroo Flat and Allen dump above the Escalante river and thought that I should be able to make it, provided I was willing to carry enough water. It looked (and was) bone dry.

As I pulled into the small parking place at the trailhead I noticed a use trail at the back of the parking spaces which looked as if it was leading up to the flat area behind. This was indeed the case. After crossing two drainages and a fence on this use trail I stepped on a flat “meadow” consisting of more rocks than grass and started drifting East. This did not last long as a canyon with relatively steep walls blocked my drift East. I continued South until I reached a use trail continuing South in an area of rock outcroppings defining the West border of the canyon. As I continued in a Southerly direction on this use trail and was beginning to wonder where it was going (Hole in the Rock road?, Fifty Mile bench?), it suddenly veered East, crossed the rocky bottom of the canyon and continued straight East on the other side. The single track was easily followable and well defined for the entire time, no cairns necessary.

Eventually this use trail joined a dirt road which in short order reached a wide open meadow without the otherwise ubiquitous pinion and pine trees: Buckaroo Flat, which the road crossed. On the other side the road reached a maze of shallow drainages and split into several roads. I took the one heading North initially. After a short stretch heading West the road turned North again, then East to describe a half circle. At the end of that the well-defined road ended and continued as a much rougher ATV road for a short stretch before continuing as a single track. This track was rougher and in in places less distinct as the track I had been following earlier in the day. This was mostly a consequence of the ground being rockier than it had been earlier. You may lose the track for a moment, but you’ll find it quite easily again. As you continue East you see a ridge ahead and a canyon in front of it and wonder how you’ll be getting around that. It is entirely unproblematic if you follow the single track.

I hit the road crossing Allen Dump further South than I would have liked, I had hoped to reach it where it turns straight East, but that’s not how it ended up working out. I may have lost the trail and gotten stuck instead on a cattle trail. On the other hand as I walked up the Southern leg of the 4x4 road I did not see a trail coming in from the West. So a bit of a mystery, but certainly not a problem.

The East-facing part of the road runs along the crest above the Escalante drainage, then turns Southeast and ends when it joins the road leading to the Egypt trailhead from Hole in the Rock road. Another mile and you are there. All very unproblematic. The view from Egypt trailhead over to the other side of the Escalante drainage is great and worth it for that alone.

    Slickrock bowl below Egypt trailhead in the evening sun


As several others I honored in the breach the prohibition against camping at the trailhead. I got up early and at dusk descended into the steep slick rock bowl below the trail head. After some mixture of slick rock and deep sand walking on more or less flat terrain you come out at the head of Fence canyon and descend into that on an intricate route using ledges and ramps. It’s well cairned (and needs to be) and easy to follow. The trail ends abruptly at the Escalante river. I sloshed downstream and then made my way through Russian olive and tamarisk mazes and over open meadows down to the Ringtail slot canyon.


                    Ringtail canyon

There is some scrambling to do, best without pack as the holes you have to crawl through are not that big. You can walk up the slot canyon for about 100 yds (maybe) where it gets wet and very shortly thereafter too narrow to continue.

I then walked back up the Escalante on the left bank as much as the geography allows in order to not miss the entrance to Neon canyon. It is marked by a rather wide cut in the Russian olive/tamarisk barrier immediately next to the river. The canyon is straightforward to follow and pretty. Then you suddenly stand in the Golden Cathedral. It really does live up to its name when the light is right. I was lucky to have had it to myself for about 20 min.

I then made my way upstream along the Escalante river switching banks as the use trails demanded. That too is pretty as you look at the canyon walls above you. Shortly before I hit the junction with Harris canyon I smelled cattle and camped for the night expecting to have to deal with bovines the next day as Andrew had warned me when I met him up on Boulder Mail trail and as Jamal has written.

However, I was in luck: no bovines in all of Harris canyon! I think that is probably a seasonal thing. When you hike Harris canyon in Spring you will encounter bovines in these low altitude grazing grounds whereas in October cattle are still kept at higher altitudes. I really enjoyed walking Harris, some very impressive alcoves, cliffs and natural bridges. There is always a relatively easily walkable foot trail on either or both banks. In the upper reaches you have to slosh for extended stretches through ankle deep water, but it’s really not an issue. At the very end you follow a dry stream bed and some use trails on the banks for about an hour or two, but it’s not deep sand, rather gravel mixed with sand and you can walk easily on it.

I think Harris canyon merits a two- or three-day trip for more exploration of the sights and sites.
Highly recommended.


Death Hollow


As I was crossing Death Hollow while doing the Boulder mail trail I had walked downstream a bit and found the canyon to be very pretty and worth a visit for its own sake. This assessment was supported by the fact that Andrew Skurka takes his groups down Death Hollow to the Escalante. Good enough for me!

I started at the Escalante river trail head on the East side of town by the cemetery and the Hole in the Rock heritage site. The trail heads in the direction of the gage site on the Escalante, but you hang left and follow a cairned trail below the escarpment to your right to the climb, the not that enjoyable piece of trail I had come down as I finished the Boulder Mail trail. Soon enough you will be out of the cobbles and ascend on slick rock. The outlook over the meadows and fields below in the direction of Escalante town is really quite striking.

I camped above Death Hollow under a cluster of pinion trees that provided good protection from the cold wind, which luckily died down in mid-evening. Next morning I descended to the Death Hollow drainage  which in October is just marvelous! The cottonwoods are changing color, so you get this mixture of yellows and greens from the vegetation, the red rock from the canyon walls and the blue sky above. The dreaded poison ivy was not evident anywhere and the switching of banks along the creek was therefore straightforward. The water was never deeper than knee-deep.


                Somewhere in upper Death Hollow

When my Gaia navigation informed me that I had about a mile to go to the junction with the Escalante river, I thought “That was easy”, but around the next corner I walked up to the narrows. “Cool” he thought until he came closer to the crux. Soon enough the three stages of dealing with hiking obstacles kicked in (same as with grief): anger, denial and acceptance.

                Cool!
 
            Approach to Death Hollow Narrows (top) and the "business end" of the Narrows (bottom)

Anger: Who is the maroon who ordered narrows in this inconvenient place? You want to make me “work” before dinner?

Denial:”They”cannot possibly have me make my way through these narrows, there has to be a bypass! (Walks a quarter mile upstream to see whether he can get on the ledge on the right bank. No dice!). Inspects sloping slick rock on right bank right above the rapids: very steep, no way way to get up there. Inspects bench on left bank and steps on sloping slick rock: clearly steeper than the angle of repose, barely makes it back to less steep rock.

Acceptance: Okay, maybe I can push my pack in front of me on this little catwalk above the raging water. For the first time in a long time I do not pity, but rather envy the longitudinally challenged: I have a hard time fitting my 6’3" frame into this catwalk. About a yard in the ledge is only about half as wide as in the early part. Retreat!

Let’s see whether we can wade through the middle of the stream. The length of the narrow is divided into two pools, one blue-green and the second one blue in color: deep water! The first right at the beginning is 4-5 ft deep, so pack balanced on one's head one might be able to wade it, but then you have to climb over a barrier rock that separates pool 1 from pool 2. Too bad I am not an economist, they have the invisible hand of the free market in addition to the two hands that the rest of humanity has. But even if I could somehow climb over the barrier rock, the next pool is even deeper and how would I climb out of that pool without pulling myself up with two hands which I need to balance the pack. No go!

Ok, back to the catwalk: let’s try it without pack first. Much easier and I find a ledge below the water’s surface at the spot where the visible ledge narrows. I should be able to keep one foot on the ledge above water and place the other on the ledge deeper down. As I proceed, after about a yd of narrow ledge above the water, it widens again and I can stand up for a little bit to see whether I could place the pack on the ledge above and reach it from this location. Bingo!

The pack is well-behaved on the steep slope above that one spot where I can stand upright and the operation of pulling the pack down towards me comes off without a hitch. Luckily I have packed light, so that as I pull on the pack it does not build up momentum that gets me off-kilter as the weight shifts from being supported by rock to being supported by me. Then I duck walk through the rest of the cat walk (pardon the mix up of the animal metaphors) to where I can stand up for good and I am done.

This is a typical solo hiker problem as you do not have a second person that can hand the pack down to you, which would make this narrows easier to overcome (once you are over anger and denial). This took about 45 min, 30 of which were wasted on the anger and denial phases.

A quarter mile downstream one more dicey spot, a wall-to-wall pool of deep blue and hence deep water and a shoe-width sloping ledge under water on the right hand side. Two steps gets you across. That too passes.

I camp right at the junction with the Escalante at a well-used campsite, a choice I get to regret as the night goes on. The resident population of microbears is out in force and leaves nothing untried to get into my pack and into my food. I should have walked another 15 min and found myself a little-used site without a habituated population of mice.

Next morning it takes me about 4 hrs to walk upstream along the Escalante to the trail head. Pretty walk in the morning sun under towering canyon walls. I had hiked this part last year already, but I again enjoy it very much.

Overall verdict: highly recommended. Take your time and, unlike Lot, look back on occasion. The sights really do change dramatically. Or (the horror!) you have to come back and hike Death Hollow upstream.


Big Horn canyon to Zebra canyon and Tunnel canyon


Following a recommendation of Jamal Green’s I decide to visit Zebra canyon and the neighboring Tunnel canyon. There are two major avenues for getting there: either from Harris trail head or via Big Horn canyon. Since I have been to the former and do not know the latter, I chose Big Horn canyon for the approach. Access to Big Horn canyon is via the Spencer Flat road which takes off from Hwy 12 at mile marker 70 (coming from Escalante the highway climbs a hill with a 35 mile speed limit at the top, a sharp right turn follows, you pass a scenic point on the left and then the road makes a 90o turn left, descending to another 90o left turn. The unsigned Spencer Flat road takes off to the right just before this last 90o curve. The dirt road has various turn outs where people can park and camp. I choose one randomly, camp there for the night under some pinions and take off next morning.

I walk the road for about 20 min, cross a cattle guard and shortly thereafter one arm of Big Horn canyon (the middle one as it turns out) becomes evident to my right. As I head over there a minor use trail and some cairns appear. You scramble down and then walk in deep sand until you hit the first major dryfall, some 30-40ft in height. A bypass is evident and after a quarter mile you can scramble down to the drainage bed, which is filled with deep sand. As you grind along you arrive at dryfall 2, also very deep. There are bypass trails evident on either side. Take the one on the left bank. Trust me! This bypass is quite long actually.

                    Some entertainment in the Big Horn canyon slot canyon

                        Dryfall in upper Big Horn canyon


This walk around is longer than the first one, but reasonably easy to follow. As you enter the drainage you hit, you guessed it, deep sand. This lasts until you come to the slot canyon, which is real fun. There are three obstacles, chockstones and debris to overcome, but it’s fun. It’s also rather narrow and the walls are leaning in in places. Your backpack, if it’s bigger than a day pack, will be scratching along the walls in places. Your fancy Dyneema pack will not be happy. After leaving the slot and crossing some more deep sand you seamlessly enter Harris wash and head down to your left. Look out for use trails above the wash bed on either of the slightly elevated banks. They are infinitely easier to walk than the drainage bed with its deep sand. Crossings of the wash are not marked with cairns but you can pick them up easily enough.


        On the flats above Zebra canyon. You get the idea
 

As you near Zebra canyon other members of the human species will be come notable and multiple paths converge on the entrance to Zebra slot canyon. It is filled with deep and breathtakingly cold water. This day is unfortunately not the right day to wade through, there are too many people and I don’t know how you’d squeeze by each other if one group comes down canyon while you are heading up canyon. I’ll be visiting again, via Harris canyon, with only a day pack.

I then make my way over to tunnel canyon over a bench that is fenced in. This bench has the Moqui marbles, which are really fascinating. These are round iron crusts the size between filberts and golf balls, some have seams that make the balls look like round clam shells.


            Moqi marbles

The process by which these moqui marbles arise is not clear. It's their round shape that gives me the most headache. What's the thermodynamics of that? Luckily, people who have thought about that for much longer than I have do not know either. If you are curious:https://www.rocksandminerals.com/specimens/moqui.htm

 
I walk deeper into the bench and then head right where I end up at the upstream end of Tunnel canyon. I probe where I can drop in and eventually select a spot where I can slide inelegantly on my butt down the last two feet of very steep slick rock. Higher up in the valley were some pools with cool water, even this late in the year. The water is brownish and you only would have to carry the caffeine to add to it in order to make coffee. Tunnel canyon is very narrow and there are some pools to wade that come up to just above my knee at their deepest. Pretty easy.

                        Tunnel canyon


I spend some more time with the moqui marbles and then head back up Harris canyon and camp right by the exit of Big Horn canyon. Next morning I visit the West fork of Big Horn canyon as recommended by Jamal, then head up Big Horn canyon again, this time bypassing the slot by walking on the bench above it on the right bank. I choose the East branch to get back to the Spencer flat road, but it has the same deep sand and a very high dryfall at the end that you bypass by walking up a steep slickrock ramp right next to it. Some exposure, but nothing to write home about. A somewhat longer road walk brings me back to my car.

This was not the best of my set of short hikes this year, but I also did not do it in the most efficient way (via Harris canyon). I had considered going via this route on my next long-distance adventure in Spring 2021. I am happy I explored it this Fall, that way I can strike that idea off my hiking plan. I can do without the slugging through deep sand when carrying a heavy pack and a couple of hundred miles under my belt already. Otherwise it’s pretty alright and what, after all, can beat spending time in Utah in October with clear blue skies, daytime temperatures in the 60's (and some nippy nights to be sure).


Lower Muley Twist canyon - Halls Creek-Baker Route-Stevens canyon route


I attempted a loop hike starting at the Burr trail switchbacks down beyond Halls Creek and then over to Stevens canyon via the Baker route. I had obtained the permit at the Escalante Interagency office but beyond that piece of paper I had received no useful information (the office was closed owing to covid and I counted my blessings that they at least issued a permit). I walked through Lower Muley Twist canyon, which is not quite as scenic maybe as the Upper Muley Twist canyon, but it’s cool enough. 


Towering cliffs and giant alcoves keep you entertained, but there is also a fair amount of watching where you step as you walk through cobble fields. As I reached the Muley tanks I found out that they were dry and my entire water strategy depended on them not being dry. Not knowing where I might be able to find water along the route I decided to turn around.

As I headed North I picked up a use trail that stayed in the Halls Creek drainage rather than entering Lower Muley Twist canyon. It appears to be semi-official even through I can’t see it drawn on my maps. Whenever this trail crosses the drainage trail exits and entrances are marked with cairns. For the most part it is a compounded dirt trail that’s easier to walk than the canyon bottom of Lower Muley Twist.


Eventually the trail crosses the drainage and you approach a trailhead complete with outhouse. There I found a sign indicating that there was a 2-mile trail to Lower Muley Twist canyon. That sounded intriguing as you would have to cross one wall of Capitol Reef. Off I go!

First it’s a trail on red dirt and then you ascend a steep slick rock ramp at the end of which the fun begins: a convoluted route over slick rock with some exposure, significant exposure for short stretches. As the slope moderates deep sand awaits you for a stretch before you descend on ramps and ledges to the bottom of Lower Muley Twist canyon. As I am coming down I notice the signs indicating this route. I had not noticed them on my way down the canyon the day before, maybe because I had been watching my feet or because I was lost in thought or “thought”. From there it's about 3-4 hrs up to the Lower Muley Twist canyon entry near the Burr trail switchbacks.

I will try this again, getting my permit at Capitol Reef NP headquarters where they have the relevant information about water. It would also be possible to cache some water coming in from Halls Creek Overlook trailhead in case the Muley and Fountain tanks are dry. The walls of Halls Creek drainage are just a wonder to watch in the morning and at dusk, so much morphology, so much play of shadows and shapes. Alas it's a long haul back to the Burr trail switchbacks from Hole in the Rock road to close the loop and get back to the car. This covid year was not quite the year for a successful 40 mile hitchhike.


Halls Creek Narrows


This time then I actually drove to Torrey to the Capitol Reef NP headquarters to obtain my permit thinking that the NP rangers might possess some reasonably up-to-date information on the water situation. That was indeed the case.

With permit in hand I drove some 13 miles to the jct with Notom Rd. and then entered the park via from the North. It’s asphalted at first but as you enter the park proper it becomes a gravel road, more an extended washboard that tests the seat of the fillings in your teeth and the solidity of the synapses in your brain. But that too passes, eventually. At a road junction with a road leading to the Lower Muley Twist trailhead, turn left and continue a short zig-zag section through the mudhills before you leave the NP. The road is asphalted again as it leaves the park and heads South. It then swings East climbing out of a shallow bowl and continuing East. At a junction with a dirt road straight ahead the asphalted road swings South and you follow the asphalt road for another mile where you turn off to the right side of the road at a marked parking lot. You could continue for another 3 miles on a dirt road but that one is pretty rough, so you need to make a call on your vehicle’s capabilities. I typically play that carefully as getting a tow out of a location like that is $$$$$$$.

I walked the three miles to the trailhead proper and then descended along the cairned trail to the Halls creek drainage. The maps suggest a length of this trail of 1.2 miles and a drop of 800 ft. In reality there is a lot of contouring with little elevation gain/loss with mixed in sections of steep descents/climbs. This is not an entirely gentle affair.

I camped in a pinion cluster at the bottom and next morning followed a well-trodden path South. It’s a mixture of walking on compressed dirt and through deep sand, so a little bit more strenuous than the distance would suggest. At the Northern junction of Halls Creek with the Hall Divide I decided to not walk Halls creek in a downstream direction as it was too early in the morning and I hoped that by walking in a South to North direction that the narrows might be somewhat warmer in the PM (It was early November, remember). The trail across the Halls Divide is a bit rough, but you get to see parts of the old wagon trail that the pioneers cleared/built. Whenever I see these remnants from the time of the settlers I am struck by how tough these men and women must have been. Let's not even talk about the Paiute, the original inhabitants of this area.

There is no particular indication of where to leave the trail but monitoring my progress on Gaia GPS I had no problem finding the Southern end of the narrows. There is a slick rock bench on the left bank from which you can climb down to creek-level and then you find a breach in the reeds and the tamarisk that allows you to find a kind-of-trail that leads you upstream.

                     Entering Halls Creek narrows from the South                  


The narrows start with a slot portion and feature a long and deep pool of turbid blue-green water. It was time for anger-denial-acceptance again. I waded into the water up until it reached well above my knees and at that point the water was darker (= deeper) ahead of me. “Who ordered this nuisance to be placed here”, “The rangers only talked about wading through water to my mid-thigh”. During the denial phase I tried to climb up on the slanted slick rock on the right bank but it was just a tad too steep for my shoes to hold. As the acceptance phase kicked in I dumped my pack and waded into the pool. When the water was right at my arm pits I was still going down and I was gasping for air since the water was so friggin cold. I was not confident that I could walk through this pool without having to take my head under water. It was also not clear that the bottom of the pools did not offer some nasty surprises (quicksand anybody?). What to do? Swimming with my pack on my head was not my number in Circus Roncalli, so that was not an option. After a brief inspection of the bench above the left bank it was clear that the solution did not lay there. So back to the right bank and as in Death Hollow try things out without the pack. This time I was successful with holding myself on the sloping slick rock shelf by using my forearms and hands as friction brakes and then robbing upwards/forwards. Soon I could turn myself around and stand up. Walking around the the slight curve that obscures possible down climb sites from the bench I soon spotted a place where I might get down beyond that miserable pool below. The descent from this bench at the Southern end to repeat the entire sequence plus pack was "interesting" in the Chinese curse sense "May you live in interesting times". But it all came together, eventually.

                            Narrows with pool at Southern end of Halls Creek Narrows.
 

On the next sunny bench I warmed and dried myself, put on another layer of clothing as the Narrows are in deep shade most of the time and noticeably cooler than the surrounding area. It’s an impressive place that defies my photographic skills as the enormous scale of the walls towering above you is difficult to capture without a second person being around that one can place in the picture to give a reference point. 


I surely can understand why it is a popular destination and am happy that it takes some effort to get there so that it does not turn into Coyote gulch. As it was I saw six people in four groups while walking through the narrows and encountered one group of four women heading there as I was walking out. That’s a level of “crowd” that I can deal with.

After exiting from the narrows I found myself a little mount in a wide section of Halls Creek drainage so that I could have some evening sun and a chance of catching some morning rays as well. It was getting really cold every night (water bottles frozen every morning) and any little bit of warmth in the morning was very much appreciated.

The rest of the return trip was uneventful. Highly recommended. Bring lots of water. The water in Halls creek is a tad scummy and algae laden. Depending on your water purification method, this might cause some problems.


Sunday, September 6, 2020

Weminuche Wilderness


The Weminuche wilderness is located in Colorado, some 5-6 hours’ drive from Denver. I had an opportunity to spend a week there this August. Specifically, a hike along the Continental Divide Trail several miles Southwest of Creede.


We started at the Thirty Mile campground near the Rio Grande reservoir about 20-30 min drive along a gravel road from Hwy CO 149 at about 9.5 k ft altitude. Conveniently, there’s a parking lot for hikers and fishermen. The campground itself was pretty busy, unsurprisingly so in high season. I had spent the night before at Silver Creek divide, further along the highway towards Lake City and even higher up. Shall we say the sleep, however much I got, was not great, but the view of the night sky was fantastic.

We hiked along the Squaw Valley trail for a few miles South and then climbed steeply for about 2 k ft up the left side of the valley on primitive, but discernible trail to reach an open ridge. The typical Colorado later afternoon thunderstorm was threatening with thunder and lightning in the not too far distance. We left the ridge expeditiously and descended steeply through a burn area. There were remnants of a well built trail, but the deadfall across it made its use difficult. Instead we descended cross country to reach the Little Squaw Creek valley where we camped well away from the "widow makers", dead trees not yet down, that abounded.

Next morning we climbed out of the valley on the other side of the valley, following a primitive but easily followable trail to reach a swampy area on a plateau at about 11.2 k ft. 

                        X-country to Red lakes

From there we went off trail, climbing much more gently than before through willows and on grassy ramps to a ridge from which we descended to the Red Lakes for lunch and a dry out of tents and sleeping bags. There we intersected with a primitive trail which led us to Trout Lake via a final rough, steep and brushy descent.

                            Trout Lake from above before the steep, rocky descent through brush

 The late afternoon brought some threatening weather all around us, but in the immediate vicinity of the lake it remained almost completely dry.


                    And then, just like that, the weather turned for the better
 

It turned out to be another mostly sleepless night, or nearly so, with another brilliant night sky with a view of the Milky Way and many shooting stars. When Nature called in the middle of the night I almost managed to lose my way on the return to my tent. Luckily I had studied the terrain in the afternoon and recognized a meadow close to the water and from there found my way back to the tent.

We climbed out of the shallow side of the bowl that Trout Lake is located in and wound our way along the Continental Divide Trail. The trail ran along steep sides of hills and I recognized the area from descriptions of CDT hikers doing this section in July with snow. That would not be easy! Along the way we encountered a large Forest Service trail crew along with a National Conservation Corps trail crew who were pushing back the brush, cutting trees blocking the trail, cleaning and installing drainages. Thank you trail crews!

Towards the afternoon after an already significant climb we climbed up to almost the top of a 12800 ft peak, contouring just below the top, to reach a junction with a more primitive trail that led down steeply to Squaw Lake, an about 900 ft loss in altitude, which we already knew we would have to ascend back up next morning. Walking high and sleeping low (or as low as possible) as the old saying goes.

We hikers really are a strange lot! We cut off the back half of the handle of the tooth brush to save some weight, may spend hundreds of dollars to save a few oz on gear weight. Yet no hesitation to go down and up 900 ft to camp at a lake shore. Just sign me up! Nuts! In an entirely good way.

It was another great night of cowboy camping, watching the Milky Way and the myriad of stars. In the morning we climbed out of the hole, hiked cross country to link up with the CDT again and followed it to Rincon La Vacca (cow corner/bay) valley. We briefly considered to climb Rio Grande pyramid that day, but as the photo below shows, the weather was not that stable (the worst of it was to the back of me when I took the picture). Cooler heads prevailed and instead we followed the valley to Weminuche Pass where we spent the night. Yet another cloudless, clear cold night with a great view of the Milky Way. Some shut-eye too.


                    View of Rio Grande pyramid from Rincon La Vacca valley


Next morning we followed the Skyline Opal Lake trail climbing some 1600 ft and contouring along a steep hillside to the base of the Rio Grande Pyramid, a 13800 ft peak we intended to climb. The  pyramid is located right next to "the window", an indentation in  a rock wall that looks as if a tooth was missing in a denture. I remember seeing this in the distance as I was hiking the Colorado trail after going over the first pass coming up from Molas lake. At that time I thought immediately of Mordor from LOTR.


                    Rio Grande pyramid and "the window" (close-up on top)

You leave the Skyline Opal lake trail and head up to a saddle between the Rio Grande pyramid and another, lower and  gentler pyramid to its right. As you approach the pyramid, even from the skyline trail, you see a whitish line on a pink/orange background going up straight towards the peak. I wanted to make a joke that this was going to be the trail to the top. It was not a joke, that was exactly what it was: a steep ascent over scree. The first section was slightly less steep and had a solid dirt base, the second section was steeper and looser with some mini switchbacks of about 10 ft amplitude in it. In this section it turned out to be easier to climb over talus on either side of the scree-filled chute rather than the one step up, half step back approach of walking on the scree. At the top of the scree section we encountered a flat talus field suitable for a rest stop before a long, steep climb across talus to the top.

It turns out that there are several roads leading to Rome. There were some cairns along the way and some short stretches of dirt that were clearly used as part of the “path”. This was a fun climb, but the air unsurprisingly was thin. Yours truly was huffing and puffing like the little train that could.

Arriving at the top, it was all worthwhile. A just fantastic view all around and towards the chain of 13ers further to the North. The view towards the West and South was hampered by the haze caused by the many fires burning in Colorado that week, but the view towards the North had not (yet) been affected.

The climb down the talus was not too difficult, but it is a bit more risky as it is harder to test whether a rock below is stable. I promptly took a fall when a sound-looking rock gave way. I nipped my right forearm, only realizing further down when a red spot appeared on my pants that I actually had punctured my skin. It was minor and the bleeding stopped without any intervention. The scree slope was steep and loose enough that one could ski down it, so that went by pretty quickly. 


                    View North from Rio Grande pyramid


Since our permit required us to camp on the North side of the divide we hoofed over there first along the Skyline trail, then along the CDT through a willow garden and across grassy plains and descended into the Ute Creek valley where we found a not so great but acceptable camp site.

Next morning we descended the valley further and set up camp on a small hill close to Black Lake. After another great night we set out for a day hike to take in more of the CDT and the Ute lakes. Alas, we got caught in a thunderstorm, luckily mostly thunder and lightning and not a downpour. We got wet a bit, but not soaked, from freezing rain and plain old rain. We returned to camp after visiting some of the Ute Lakes. The afternoon cleared up as if the thunderstorm had never happened and the early evening was very pleasant in the setting sun. Next morning we hoofed out to the Ute Creek trailhead where the cars were waiting and headed for Creede for burgers and beer.

                    Last camp site in Ute Creek valley near Black lake

All in all a great six days under very favorable conditions. While we saw many traces of animals such as scat and hoof prints, we did not see many animals themselves. Maybe they had checked their calendar on Google and noticed that the bow hunting season was to begin soon and decided that it behoofed them, if you pardon the pun, to hoof to more inaccessible meadows.

I think it was Alan Dixon who told me about the extent of damage to the trees in the Weminuche and he surely did not exaggerate. In difference to the devastation from fires I witnessed along the GET, the trees in the Weminuche are still standing since the "change agent" is the bark beetle, but the sight is no less or not much less depressing. There is some obvious new growth in amongst the deadwood and the discussion centered around whether the trees were growing fast or slow. Given the altitude yours truly favored the slow growth hypothesis.

I had been in the general neighborhood, mostly along the Colorado Trail for trail crew or during my through hike. From these vantage points I had not seen the range farther to the North which really invites another visit to the area and more exploration. I'll be baaaaack!


Tuesday, September 1, 2020

Tahoe Rim Trail


With my original summer 2020 hiking plans for the Cordillera Huayhuash and the Cordillera Blanca in Peru in shambles owing to Covid, I needed to come up with an acceptable, challenging alternative. I therefore planned on spending the summer in California, specifically the Sierra High Route and the Southern Sierra High Route as a similarly alpinistically challenging adventure. Since neither of these routes dips below 10k feet for long, I thought it was going to be prudent to throw in an acclimatization hike or trail crew work that would get me adapted to 8k-10k feet altitude since I live at barely 50 ft above sea level. With most scheduled trail crews cancelled owing to Covid, the Tahoe Rim Trail fit the bill for this acclimatization hike. It can be done in about 10 days without too much trouble and only requires a permit for crossing the Desolation Wilderness. The TRT also comes recommended by Amy and James at doingmiles.com, and I have found that you can take their recommendations to the bank.

Owing to closures of Yosemite and the Lake Tahoe area due to Covid and the relatively late (relative to my preferred dates) opening of the area around Truckee and Lake Tahoe, things did not quite work out as I had imagined. Once these areas opened up and I was convinced that they would not close up again right away, I applied for my SHR and SoSHR permits. Little did I know that this is a month-long to six-week long process. I am sure the Forest Service (FS) front line workers do the best they can with the tools they have, but these tools appear to suck pretty badly when you consider what you can do on your smart phone these days with a couple of clicks. It surely did not help that the offices had moved to virtual operations and you could not talk to a ranger directly and had to play phone/email tag.

In the end I submitted my SHR and SoSHR permit applications in the hope that the permit would come through by the time I finished the TRT and I took off for Reno.

I had planned on doing the trail in 11-12 calendar days, starting late in the afternoon of the first day after arriving from Reno and hoping to finish around noon on the last day in order to be able to make it back to Reno where I would be doing my last minute prep for the SHR/SoSHR. I chose to start in Tahoe City which would allow for a resupply not quite half-way through in Kingsbury, NV. This plan accommodated the fact that the East rim of the Lake is pretty dry and requires longer water carries. By that time my food supplies would be down and the total weight of my pack would be reasonable throughout.

Needless to say that also did not quite work out as planned. For one I was a little bit faster than I thought I would be. This faster pace put me at Kingsbury on Friday July 3rd, the day the Fourth of July holiday would be celebrated and the PO would be closed. Then it turns out that the POs in that part of Nevada are not open on Saturday, a fact that had not occurred to me to check out beforehand. All of a sudden I was going to be spinning my heels at Kingsbury for two or three days. Another unexpected piece of intelligence was that the Kingsbury PO on state Route 207 does not do General Delivery and they forward the package up the road to the Zephyr Cove PO. Luckily that had not happened yet with my parcel and I could retrieve mine at the intended PO. Just a word of caution to others. The Zephyr PO is 3.5 miles up the road (US 50) from the one on SR 207. So if your parcel lands there the retrieval of it almost becomes a day long operation.

Tahoe City to Brockville Summit


To say this right off the bat, this section is the most hohum portion of the entire TRT. After climbing and contouring for some four or five hours I camped in a small clearing off trail, cooked my dinner and tried to get over my jet lag. I cowboy camped and as usual sleep overtook me only in the wee hours of the morning.

The next day I made my way through more forest without much in terms of scenery, botany or anything else to hold my attention. Hopefully the scenery would improve or this was going to be one drag! Luckily, the trail comes recommended and hopes were high that the scenery would improve.

That evening I crossed the Brockville Summit Road and made another cowboy camp deep in an old growth forest. Right before crossing the road I got lucky in meeting two young guys approaching the end of their hike who had stashed water near the road crossing and they were happy to share what they did not need. I recommend a water cache at that location if you are in the business of caching before doing this hike. There is not much of a natural source, at least after as dry a Spring and early Summer as this year (2020) and the only alternative is yogying some water from day hikers at the road crossing.

And of course, the sleep sucked yet again. I really don’t understand how I can crank out these miles without decent sleep, but trip after trip this is what I do.

Brockville Summit to Mt. Rose area.


Next morning I climbed out of the forest towards Rifle Peak and as I exited the forest the views markedly improved. I briefly chatted with a group of local trail runners and after that had the trail almost all to myself all day. The views over the North shore and towards the South of the lake basin were really great.


In mid-afternoon I ran low on water and tried to collect melt water from residual snow fields on Mt. Rose Knob. That was surprisingly unsuccessful, the melt rate really was not at all what I would have expected for the time of year. A descent to Mud Lake was more successful. Contrary to what its name might imply, Mud Lake had very clear, cool water and my water problem was easily solved. As I climbed higher up towards Mt. Baldy I started to think about how to pace my hike to be able to reach Kingsbury when the post office would be open. As I checked out the Kingsbury Rise PO hours, I found out to my horror that they were not open on Saturday, Friday was going to be the day the 4th of July was going to be observed, and Sunday they were closed anyway. So they were going to be closed for three straight days. There was no way I could possibly spend three days walking from Mt. Rose to Kingsbury, maybe on my knees or walking on my hands or walking backwards, but not at something resembling my regular pace. And the food I was carrying would also not be lasting for that long. Since I had not yet recovered from my weight loss from my GET hike I also could not use an extended East rim hike without food as a weight loss opportunity. So a change of plans was in order.

I got off the TRT just past Mt. Baldy and walked the road to Third Creek Pond. Shortly before the road reaches the lake there is a piped spring on the left side of the road. Very convenient! I camped close to the spring in an old growth forest that provided some shielding from a cold, persistent wind.

Next morning I headed down to SR 431, walked down to the Ophi Creek/Tahoe Meadows trailhead and descended from there to Incline Village along a bike trail in the forest that ended in a subdivision. From there down Country Club Road down to the bus stop of the local bus system where a bus brought me back to Tahoe City. Yeah, public transportation! I must say, it is convenient to be on a trail where you also have internet access so that you can make plan changes based on data rather than your hopes. It was a first for me, but I won’t make it a habit!

I recovered my car, drove to Kingsbury to retrieve my food parcel. On my drive back I also cached some water along the route where I could conveniently do so. I parked the car at the Ophir Creek trailhead in late afternoon.


Ophir Creek Meadows to Spooner Lake


The early portion of this section, about 8 miles to Tunnel Creek Rd, is said to be the most popular section of the TRT. In particular it is popular with mountain bikers, so popular in fact that it is suggested strongly that mountain bikers only use this section on even-numbered days and refrain from biking on odd-numbered days.

Now my personal opinions about mountain bikers, few exceptions notwithstanding, is that they are one of four kinds of pests the hiker encounters in the backcountry: chiggers, skeeters, deer flies and bikers, in order of increasing size, not necessarily in order of annoyance.

This being July 2nd I encountered a few bikers, but the terrain was not suitable anyway for downhill races at the speed of light on trails with limited visibility. So while there were bikers, they were not causing the usual annoyance that evening.

After a couple of miles I found a ridge on the lake-side of the trail which made for a private and wind-protected cowboy camp and spent an uneventful night.

As I took off in early morning hours I mentally prepared for a busy day, this being the Friday on which July 4th was being observed. However, this concern proved to be unnecessary, at least early in the morning. There was one pair of bikers for whom the rules apparently did not apply. Otherwise I ran into a few trail runners and into a few day hikers, but definitely not hordes of bikers or hikers.

The trail afforded the occasional grand view of Lake Tahoe from high above and the opposing shore where I would be hiking and later be ending my hike a few days hence. There were stretches of hiking in old-growth forests with massive spruce trees with a base-width twice my shoulder width.


While I had no intention to camp at one of the few permitted camp sites on the East shore, near Marlette Peak, reaching it was part of the plan as it also features a spring where water could be obtained. The Guthook app indicated the spring, but online reports from TRT hikers suggested that it is “not working”, whatever that may mean. I reached the junction of the trail before Marlette Peak where the trail divides and you get the choice of walking around the peak on either the lake-facing side or the backside. These two alternative trails join again on the other side of the peak. Because of the need for water I chose the backside trail. It descends a little in the forest and then contours across an open hillside to then again enter a forest. Shortly after entering the forest I noticed a little rill, which upon inspection provided a modest flow of clear, cold water. Just the ticket!

As I was collecting water by means of a ziploc bag a mountain biker came hurling through at the speed of light hurling abuse at me as he screamed by. Two of his mates, a father/son pair, came a little later and I was ready for them, but they were polite anyway and reduced their speed appropriately.

With my water bags filled I returned to the spot where the trails separated and took the lake-side alternative around the peak for the better view. This is the obvious way to go, the views are superior and the side-trip to the rill sets you back about 20 min, there and back.

        Marlette Lake in foreground and Lake Tahoe in back


As you reach the trail junction of the alternative trails around Marlette Pk. you cross a 4WD road that leads down to Marlette Lake and a while later you cross another dirt road, this one prominent enough to have a name: Hobart Rd.. Here, the entity responsible for the signage actually does spell it out that the source at the Marlette campground is not active at this time. They direct the hiker down the road in direction of Lake Tahoe, some 0.75 miles, to a spot where the road crosses a stream. So whichever way you follow, there is an opportunity to replenish water supplies around Marlette Pk. and in either case it’s not too far off track.

Hobart Rd also defines the beginning of a section, lasting all the way to Spooner Lake, where the annoying mountain bikers are not allowed to roam. The trail continues a little while out in the open as you contour below Snow Valley Peak and then enters the forest. I encountered a few hikers heading into the backcountry, but it was a pleasant walk through old-growth forest, alas without much of a view out to Lake Tahoe.

At the end of a long day I reached Spooner Lake and a convenient spot to collect water from its shore. There I met a young couple who were doing the TRT in the counterclockwise direction and had ambitious plans on daily mileage as their job required them to be back at work on a specific day. It’s nice to be retired, is all I can say.

I camped using my tent along the path leading from Spooner Lake to the Spooner trailhead for the next section leading to Kingsbury. The bugs were just a tad too bad for a cowboy camp.


Spooner Lake to Kingsbury


This section starts with a walk and climb in an old growth forest. As you exit the forest you a reach a bench, as in a geographic feature, with an open vista of Lake Tahoe and a bench, as in a piece of outdoor furniture, from which to enjoy the view. From there you continue across a bit of talus and marginal meadow before you descend back into the forest. It is bit of a drag section as you wander through the forest without much in terms of views to keep you mentally engaged but some of the old growth trees really are magnificent.

Towards the Kingsbury trailhead you have to pay attention as there is an entire network of local trails that intersects the TRT and it is easy to get off track if you don’t pay attention. I of course had to take the opportunity to not pay attention and ended up in a subdivision some way off SR 207. Here again it came in handy that the TRT is often within reach of internet connectivity so that I could use Google maps to chart a course towards the highway. In the end it did not matter as a woman whom I had passed while approaching the Kingsbury trailhead stopped and offered to give me a ride. Thanks! So in short order I reached the small cul-de-sac where a connector trail heads to the TRT. I had used this connector to cache some water there.

In short order I found a discreet spot where I camped in dense brush by the side of the trail well hidden from bikers and people walking their dogs. There was some Fourth of July partying going on in the fancy houses above, but not too bad.


Kingsbury to Armstrong Pass


Next morning I started off with a significant climb through old-growth forest until I reached the first of two ski lift tracks I had to cross according to the maps. I lost the trail here for a little while and walked over to the second lift in the company of another young couple who were also doing the TRT. It was their first day on the trail and they were going to take it easy on this day, intending to increase their mileage in subsequent days. We found the trail again by the second ski lift and hiked together for a while, then passing one another a couple of times before they sped ahead to Star Lake.

When planning my hike I had considered camping at Star Lake as well, but the amount of humanity around this body of water quickly persuaded me that this was too obvious a camping spot to be enjoyed with some solitude. I pushed on and after a climb up Freel Pass followed by a descent over long switchbacks and a contour I found a quiet camping spot off trail shortly before Armstrong Pass.

Armstrong Pass to Round Lake


After a beautiful night cowboy camping off the trail, I continued on next morning. After crossing the pass I passed by Freel Meadows, a welcome opening in the forest with a great view of the mountain ranges farther South. 

The trail was busy with mountain bikers but they were all climbing and hence slow. Most had plans to descend to a road off Armstrong Pass, so no expectation of bikers coming out of nowhere from behind. I decided to call it an early day at Round Lake, which is right on the trail but was not crowded at all. It was windy but I found a nice shielded spot on the shore and enjoyed hanging out in the sun with a view of a chain of mountains to the South of me.


Round Lake to Tamarack Lake/Desolation Wilderness


Next morning, after a brief climb I left the forest and stepped out on a huge meadow below the chain of peaks I had seen in the distance from Round Lake. Here the trail makes a sharp turn to the Northwest as it joins the PCT. After crossing a few streams the trail starts to climb to a wide bench below the peaks heading more or less straight North. There are some spots with absolutely fabulously beautiful views over the basin at the Southern end of Lake Tahoe.


I had arranged online a permit for the Desolation Wilderness for July 6-8 and was now about a day behind schedule, the day I had spent retrieving my food parcel. The FS requires you carry a paper copy of the permit and the way to get it is to either have it mailed to you some two weeks before you start your hike or by picking it up at the ranger station outside South Tahoe (The option of email with pdf attachment is not on offer. It’s the 21st century FFS!) I had done neither and since I intended to reach the wilderness this day, something needed to be done. They say on their website that you can call them before 4 PM of the day you enter the wilderness. I had connectivity for my phone at a couple of spots as I hiked towards Echo Lakes, but of course the office was closed owing to covid and one had to leave a phone message after being told that they would be providing services virtually. It is fair to say they virtually provided services as opposed to virtual services, but practically they did not. I did leave about five messages and did not receive a response all day. I figured if they were not in their office, they sure as hell were not going to be in the backcountry to check permits and pushed on.

At the Chalet at Lower Echo Lake I splurged on two oranges, one of which I managed to keep for later, and two ice cream sandwiches. I then trodded along the rocky trail above Lower Echo Lake, above the cottages, and making room for day hikers coming the other way. By this time I was running low on water as there had been none available at the boat ramp by the chalet (or I had not seen a tap). To your left below you see the rocky barrier between Lower and Upper Echo Lake and you think you might be able to access water there, but then you notice more cottages and that’s the end of that. Soon after you pass the end of Upper Echo Lake there is a sign indicating the border of the Desolation Wilderness. By that time it was already clear that desolation =/= solitude, the trail was obviously heavily used as suggested by the width and shape of the trail. As I hustled along my left ankle rolled as it has the annoying habit of doing, an overuse injury that I have been struggling with ever since the Pyrenees hike. This time I was violently hurled forwards and landed head first on a granite rock that defined the left border of the trail. This effing hurt! It was also clear that I was bleeding from some sort of head wound and that my sun glasses had broken in half at the bridge above the nose pads. A young Frenchman who apparently had been right behind me helped me to clean myself up and to put band aids on the cuts that were sufficiently small to be covered by band aids. There was apparently a major deep gash on my nose that he thought I should have looked at as it might require stitches. After thinking this over I came to the conclusion that I would not get to see a medic that same evening and that I might as well just continue up the trail.


                    Looking a tad worse for wear after a fall. The end of my lucrative career as an after shave                     photo model.


I am not sure how I would have found the major gash without the assistance of my French friend. I guess in future I should pack a small ladies’ powder mirror in my first aid kit for the cases when a helpful Frenchman is not at hand to help me find my wounds. It later occurred to me that I could have taken a selfie with my phone but in the heat of the moment with blood everywhere that idea had not come to me.

I camped on a granite slab above Tamarack Lake which I had visited just to collect some water. I had no interest in camping by water’s edge because of the traffic down there, both human and small biting animals as well as possibly bears making their rounds to collect dinner. There was also a certainty that there would be some heavy condensation as the night cooled.
 

Alpenglow above Tamarack Lake in Desolation Wilderness


Tamarack Lake to Fontanillis Lake


I woke up to significant swelling of my right cheek but no significant discomfort or pain. I made my way along the extremely busy Lake Aloha, at the end of which the crowd significantly thinned out. Whoever named the lake Lake Aloha must have had a sense of humor. There is nothing gentle or welcoming to it, just krummholz trees and granite ramps and rocks everywhere. The lake appears to be a major destination for hikers to hang out at and for fishermen. I was not too sad bidding aloha to Lake Aloha.

        Lake Aloha in Desolation Wilderness


Once you turn away from Lake Aloha the trail is still rough on occasion for a stretch but the next two lakes, Heather lake and Suzie Lake, are really lovely and made for a nice lunch spot from which it was not easy to tear oneself away. Then comes a long climb up to Dicks Pass past Lake Gilmore with some spectacular views over the area one has crossed earlier in the way and the terrain West of Dicks Lake down below.

Dick’s Pass is peculiar. It is the only pass I can recall to have crossed in all my hikes where you have to climb one of the mountains defining the pass in order to cross said pass. But a look down the other side to the North convinces you pretty quickly that this further climb is not optional. First there is a major cornice one would have to get over and the hillside below the cornice is extremely steep, most definitely not within reach of a hiker as opposed to a climber.
 

        Cornice at Dicks Pass with Dicks Lake in front and Fontanillis Lake in back.
        Dicks Pass (low point at left) from the North, above Dicks Lake
   
So up you go another 400 feet, to 9400 ft, then you walk a ridge and then you descend in switch backs through the forest ending up at the outflow of Fontanillis Lake. The water flowing out of this lake then cascades down a long granite ramp, which I used to descend as well to a small lake below, Upper Velma Lake. The trail as designed descends through the forest to the left of the cascade, but I felt a little bit like slick rock walking and that’s what I did.

At the bottom if found a nice granite slab to sleep on, still warm from the sun. I cowboy camped and used the noseeum netting of my tent  draped over my head as a way of dealing with the bugs, which were not really bad but sufficiently numerous nonetheless early in the evening to be bothersome.


Fontanillis Lake to Barker Pass


This section is mostly level walking through old growth forest, some of which is just a tangle of dead trees, and the trail winds through it. Here you actually have to pay attention to where you set your foot and where the trail is headed. In the middle of nowhere you finally pass out of the Desolation Wilderness as indicated by a sign by the side of the trail. Some time after passing Richardson Lake, a good place for a lunch with a breeze and a dip, the trail climbs up the side of a mountain in switchbacks and you come out in the open at the Barker Pass trailhead.

        A baby rattler I almost stepped on. The rattling was too pathetically faint, but I did see something         move
 

After a snack break I decided to continue on for another couple of miles in order to have fewer miles to cover next day when I hoped to finish in Tahoe City around noon so that would have enough time to make my way to my car, now waiting at Ophir Creek/Tahoe Meadows rather than Tahoe City.

Along the way I passed a sign for the Tahoe to Yosemite trail. I have to find what that I is all about, might be worthwhile if and when I retire from doing really long trails.


The trail climbs steeply from the Barker Pass trailhead and then contours in and out of several valleys. A well used campsite by the side of the trail was my home for the night. It had a breeze and the bugs were therefore kept at bay.


Barker Pass to Tahoe City


Next morning I hit the trail at the crack of dawn, ok it was 6:30, and continued to climb entering the Granite Peak Wilderness which offered yet another spectacular view. Shortly thereafter the TRT and the PCT separate and a long contour followed by a long descent through old-growth forest ensued.

        View East From Granite Peak in the eponymous wilderness


I passed my last TRT trailhead along a dusty, hot forest road, climbed up another forest road and then contoured over a forested plain, Page Meadow, which obviously no longer was a meadow. There was significant mountain bike traffic on the trail, but with few exceptions the bikers were considerate. Slowly the signs of civilization being near increased and after a short steep descent I found myself by the side of the Truckee River, filled with rafters who apparently had not heard of covid, and than at the main intersection in Tahoe City.

After a delicious sandwich from a taco truck at the main intersection in town I caught the bus to Incline Village and made my way up Country Club Drive to SR 431, the highway to Reno. It was one stinking hot hike and I had not planned my water supply correctly! At the top I tried half-heartedly to hitchhike up to Oiphi Meadows, but this dirty dusty hiker had no luck. I was a bit more lucky with water by yogying some in the subdivision and then I hiked up the mountain bike trail that I had come down days earlier to pick up my car in Tahoe City. By 6:30 PM I reached my car and found everything in good order.


Coda

An hour later I found myself in Reno in a hotel, washing off ten days’ worth of grime, heading out to pick up a pizza and a few adult beverages. Alas, as I checked my email the hoped for permit for the SHR/SoSHR had not materialized in the interim. So this had not been an acclimatization hike after all. Nonetheless, I had had a good time. The Lake Tahoe area is really pretty (I know you were waiting for this blinding insight. I really try to add value) and not at all overdeveloped as I had feared (without having any specific reason for this fear) nor as overrun on a July Fourth weekend as one might have expected.

Overall it took me eight full days and two sort of half days and with the exception of one, from near Oiphi Creek to Spooner Lake, I did not really push it. Perfect hiking weather every day, blue skies and sunshine without it being too hot. Given the base altitude of the lake, you do not realize how high up you are most of the time.

The TRT is really suitable for a longer shakedown hike or a first through hike where the learning curve on all sorts of questions is steep. It is well signed and so you would get a freebie on the orienteering and can instead focus on other aspects of long distance hiking that you need to work out for yourself.


                            no clue what this is called.