My through-hike attempt of the Hayduke route in 2021 had ended with an injury near Hite, which, as it turned out, took about a good month to heal. I had been lucky at the time to get a ride from Hite to the I-70 corridor. Appears not to be the easiest hitch in the world judging from the frequency of cars passing by.
This year I faced the reverse problem: how to get from the I-70 corridor to Hite to resume the hike where I had left off the year before? So I tried Craigslist, but the responses were either from people unable to read when I was going to need a ride, people who thought they had me over a barrel ready to be plucked or people who introduced themselves as having "a truck that may be a bit rough but it does well in snow". Yup, snow in Southern Utah in mid-April on roads running at about 5k ft sounded exactly like a problem in need of a solution by way of a "rough truck"!
I decided that I was going to hitchhike from Green River UT and I was getting there from Denver via the California Zephyr train which has a stop at Green River UT. I cached food and water along my route in the first week of April, then I participated in a family-affair, which I could not possibly duck out of, and returned to Green River. It turned out that I had been bellyaching about a non-problem.
I stood at the West end of town near the on-ramp for the I-70 for maybe 20 minutes when a ranger for the Goblin State Park along UT-24 stopped and took me to the jct of I-70/Ut-24 where he turned North while I was heading South to Hanksville. I walked over to the off-ramp of the I-70 coming from the West and stood there for maybe another 20 min with lots of cars passing me that came from the East off the I-70. But the first car coming from the West stopped and took me to Hanksville. Chloe was going for a few days of car-camping near Bryce. In Hanksville I walked to the South end of town near Stan's burger joint and gas station, fully expecting to be there for a long time. Car #6 stopped within maybe 10 min and took me all the way to the bridge over the Colorado near Hite. George had been camping solo for a week and needed someone to talk to. Works for me!
Rock Canyon to Highway 95
I found my cache intact, loaded up and started walking along the road in Rock canyon by about 3 PM. Who would have thought! This exceedingly smooth start to the hike far exceeded my most optimistic takes on what this day might look like.


Along Rock canyon road
I passed the corral about half way up the canyon that's right up against the canyon wall from where there is supposedly an old road leading up to the top of the cliffs. I had considered that as a way to get out of Rock canyon, but decided to take
the route via the chimney to see what that was all about. If it was going to look
too risky I could always just return to the corral and take the road. Looking South I watched a rancher on horseback trying to guide a herd of cows and calves across a slickrock bench to water. The cows knew the deal and trodded along in the direction the rancher wanted them to go. The calves, on the other hand, did not know what the deal was, being only a few weeks old, and tried to sneak away all the time. I did not know that a good Mormon rancher could have such a rich vocabulary of expletives! I camped in a dryfall that provided a nice shelter from the wind that was blowing pretty strongly, a developing theme for this year's effort, not that I knew that yet.


Slot canyon near my camping spot along Rock canyon road
Next morning I continued up the road to another corral of more recent vintage. It is located where the Rock canyon road veers right and is shown on the map. From there the Hayduke hiker continues straight ahead North, off-trail. It is a gentle cross-country stroll, mostly easy walking, until you reach the side canyon pointing East and the main canyon veering West. This side canyon at its entry has the cave described in the guide book, hard to impossible to miss. Climbing up to the cave on a dirt and boulder slope and then contouring at the foot of the cliffs led me to "the chimney", advertised as class IV, that leads out of the canyon to the mesa above. Much ink and/or electrons have been spilled over this chimney in trip reports. My addition to this existing body of work is that it is not as difficult as it is made out to be in some of these reports and not quite as easy as it looks. The difficulty stems from the fact that there are not a lot of hand holds and you have to wedge your body into crevices as you relocate your feet for the next push up. The crux is a stretch of maybe two body lengths, or three if you are longitudinally challenged. I left the pack below and just pulled a throw-line up behind me to a point where it seemed easy to pull up the pack.


Upper Rock canyon

The chimney climb out in Rock canyon
Seemed easy is the operative word here. The pack came up, but then got stuck at a small overhang, just far enough down that I could not reach the grab loop while at the same time keeping tension on the throw line (had I sat down at the edge of the ledge, there would have been no problem. Woulda, coulda!). Eventually the pack started slipping giving me a really nice rope burn across four fingers of my right hand, that took a couple of weeks to heal completely. I was more successful on the second attempt, thankfully. The second half of the chimney I navigated with the pack on my back and that was pretty straightforward. The lesson here: don't use 3 mm rope as a throw line, the weight savings is not worth it.
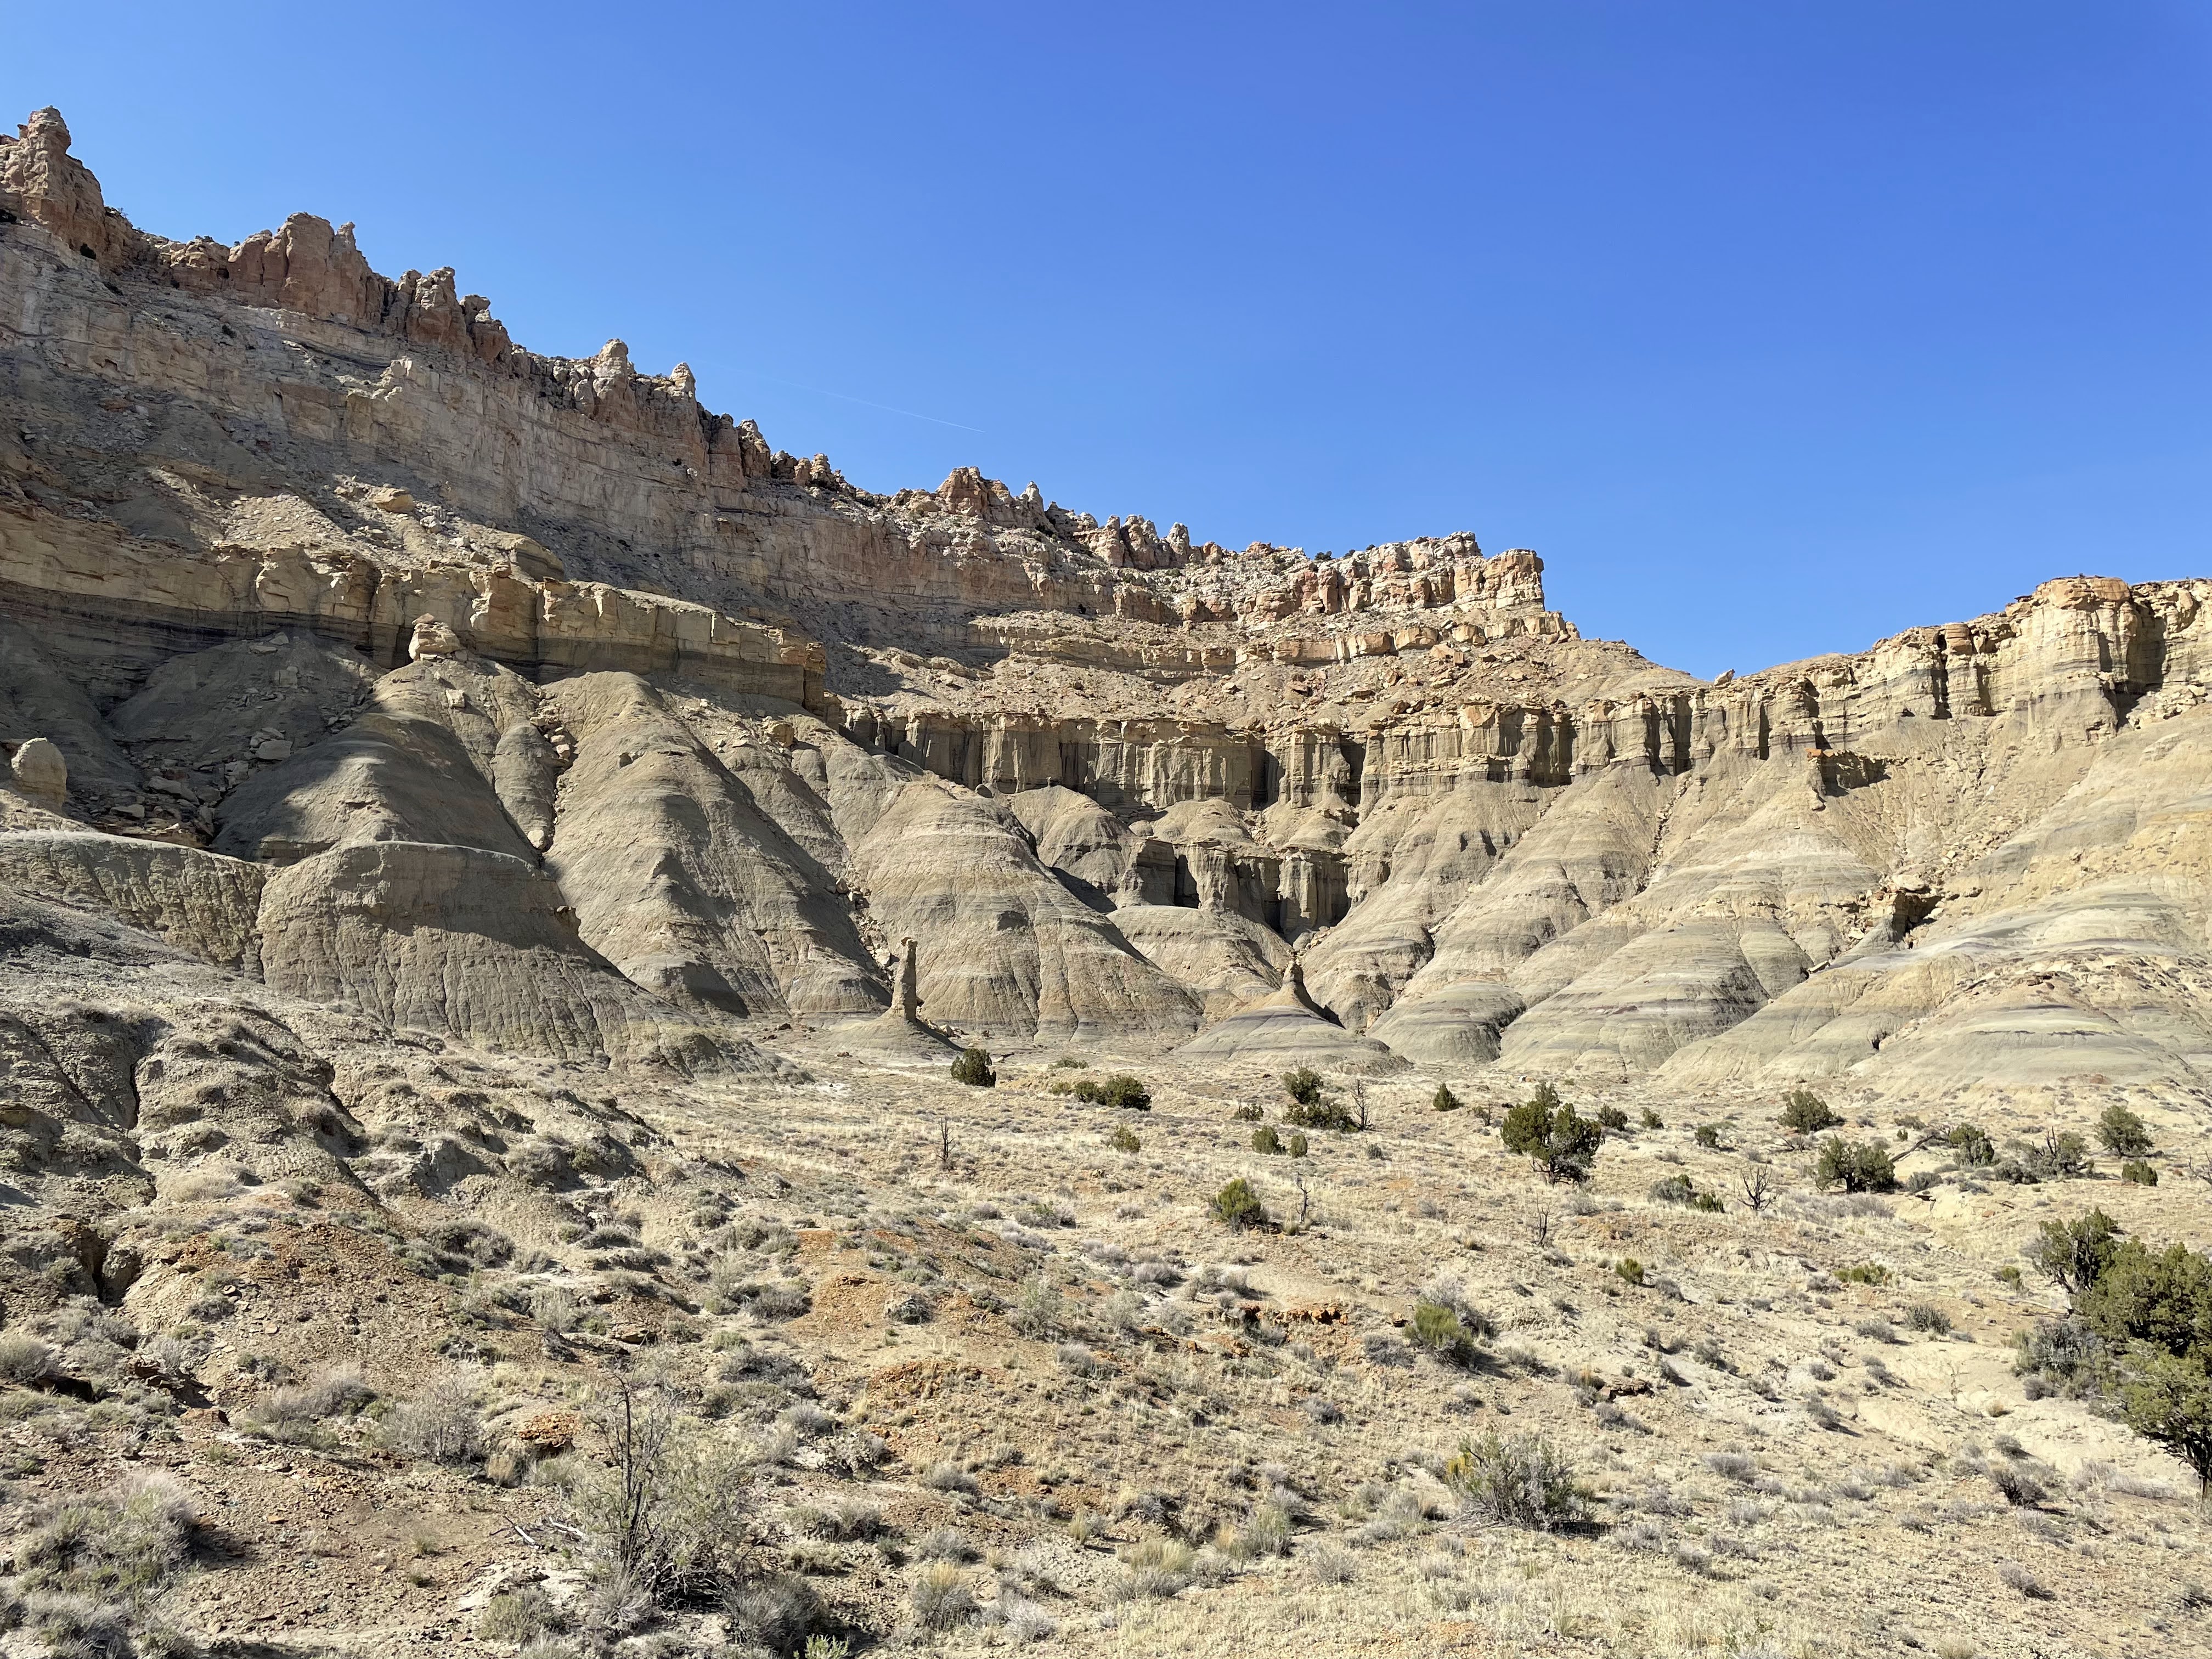
Once on top I drifted Northeast until I saw the first Jenga cairn and followed the ridge it was sitting on farther Northeast. I saw some ledges that I intended to follow West until I also noticed the second Jenga cairn one level up. It seemed pointless to ignore what the cowboys had built, they had traveled the Red Benches for many years after all. So I climbed up to the cairn and then headed more or less Northwest on a higher set of ledges. This worked like a charm at first, easy walking up to the point where the map identified "Red Benches" at 4951AT. Since everything had been going peachy I extrapolated that this peachyness would be continuing if I just continued the way I had been going!
Let me tell you, it sucked donkeyballs! The washes are all low contour, so they do not appear on the maps with a 40 or 50 ft contour interval. There is an infinite seeming number of these that you have to cross, many have slickrock bottoms that you can't climb down to and/or out of, so you have to walk along the wash upstream until you can cross, there is no shade, the ground is either loose or consists of mud hills that don't provide good contact to the soles of your shoe. On top of it in the early afternoon a strong, gusty wind came up that pummeled me from either the side or the front and pushed me around as it pleased. It just sucked!
There was the odd cairn, forlorn in this desolate place and not really all that useful for the decision on how to continue. Eventually I reached the northernmost Jenga cairn and from there a hole on top of a cliff face to the West that provided at least some shelter from the wind for the night. It still was a rough night, but I did get some sleep.

Next morning I returned to the Jenga cairn and descended into a wash to the Southwest of it, pointing West, that would lead me to the "the fortress rock". I woke up a young couple, also Hayduke hikers, who were camping at the head of the wash. They were just reaching consciousness, but we all agreed that the Red Benches had sucked, and sucked badly. I continued West and then had to correct a bit towards the South to reach "The castle". From there a use trail leads West towards the location of the entry into Fiddlers canyon. If you just follow the ridge and the foot prints you will reach a point some 300 ft from the entry and will find yourself separated from it by a deep wash. You have to backtrack a bit and then can descend into the wash and find out a way the other side. The obvious solution is to either walk in the wash itself instead of on the ridge or to walk on the left (South) side of the wash rather than the right (North) side.
Either way, the entry to Fiddlers is not hard to find, some dramatic descriptions online notwithstanding, and it is not more difficult to descend into than anything you have seen in Youngs canyon earlier. The first half is on a dirt slope with lots of loose rocks of varying sizes, the second half is a set of dryfalls that you can either climb through or use an established walk-around.

View from the entry point into Fiddlers canyon
 Descent into Fiddlers canyon from the bottom. Once comes down the dryfalls in the center, the rock and dirt slope is to the left behind and above the rocks at the front left.

Hoodoo at the bottom of Fiddlers canyon, aka "The bowling pin". This thing is about 150 ft tall
By this point I was all out of water, even though I had used sparingly what I had left. The hope that there might be some water at the junction of Fiddlers and Hatch canyon was dashed, not all that surprisingly given the general conditions (but the hope, it springs eternally, quite unlike the springs) and I dragged my sorry butt to the Dirty Devil through the tangles of Tamarisk at the water's edge to get water. It was hotter than all blazes and I vegetated in the shade of the tamarisk while drinking Dirty Devil water. It filtered pretty well, I must say, and I did not even have to settle suspended solids as I had had to do years earlier near Happy Canyon further upstream during a wet Spring with much higher flow.


Given all the reports on how difficult the Dirty Devil was I did not feel like doing this the same day and so I camped at the junction of Hatch canyon and the Dirty Devil, working on my rehydration. Next morning I ventured upstream and found the river a complete nothingburger. If you are not a complete doofus and pick your crossing sites carefully there is absolutely no problem. In rocky wide areas the water reached mid-calf and in narrow fast-flowing sections to mid-thigh. I got into "trouble" twice, but only because I was being a smartass. I wanted to cut two river crossings by squeezing by at the bottom of cliffs. The river has deposited deep muck in these locations and this muck latched on to one of my shoes and wanted to keep it. The foot was already out of the shoe, but the Dirty Girl gaiters, specifically the metal hook at the front, held on for dear life and allowed me to pull the shoe out nonetheless. I obviously did not get smart after it happened the first time, but pattern recognition finally kicked in after the second time. Losing your shoe down there would not be a good scene, it's a long and rocky road to the highway walking on a sock.
I reached the Poison Spring canyon entry, crossed the Dirty Devil one last time and had a wonderful break in the shade of the giant cottonwood trees. The walk along Poison Spring road is just another road walk, little shade and not much to keep you entertained. I scared some cows and then reached the spring at the bottom of the cliffs on the right side of the road. It is easy to find as water is running on and along the road. Beautiful cold and clear water! I got to wash the muck out of my socks, filled my containers and then headed up to Arsenic canyon where I intended to take the Nic Barth alternative as I had walked Poison Spring road to its grim end at Hwy 89 a few years earlier. It had not been so entertaining that it needed to be done again.
Arsenic canyon started out easy enough and even had some water running in it. Whether I would rush to drink water from a canyon bearing the Arsenic name is another question. It did not come up, though, as I was all filled up from the great spring earlier in the day. The middle section of Arsenic canyon is what Jamal Green would call "brushy". Here I ran into a solitary bovine that stood its ground. It ended up being a Mexican standoff of sorts. I still am not sure whether the animal tried to charge me from behind in a non-obviously charging kind of way or whether it was seeking company. In any case it came way too close before finally losing interest in me. I was ready to inflict some pain with my walking poles or a well-placed kick to where it hurts, but in the end I did not have to.
I camped on a bench out of the wash, but the presence of water of the not fast-moving kind meant bugs and they feasted on me all damn night. Next morning I intended to visit the Arsenic arch, but the slot leading to it was kind of cumbersome and I did not need to see the arch so badly that I was willing to put up with the obstacles. I turned around and headed upstream and was enticed by a cairn to climb out to the left (LUC) where a further set of cairns leads to the arch, I suppose. I did not follow the cairns and went on a little pursuit of my own, heading West into a slickrock bowl. I climbed higher in a southerly direction and found myself on a shelf halfway up the side of a giant canyon with slick rock walls. After some exploration of a way to get up from this shelf I found another slickrock bowl that easily allowed me to reach the mesa on top and a short walk from the road that connects Arsenic canyon and the arch with highway 89.
Some canyoneers were leaving the backcountry as the weather was said to be about to turn and the guy in the second car offered me a ride to the highway which I gratefully accepted. Interesting old fellow with many decades of experience in the mountains of Arizona and Utah.
Highway 95 to Capitol Reef NP
I found my cache near Little Egypt undisturbed, so I loaded up and ditched some stuff and trash. Looking ahead to the Henry mountains I had my doubts that I would be able to cross via Mt Penellen South summit. The wind at ~ 6k ft was toying with me as if I was a piece of trash by the side of the road and I figured it was going to be a tad worse up at 11k ft. The final decision I was going to make higher up along Crescent Creek Rd. First I had to find the Nic Barth climb up near Little Egypt and for that I first had to find the hoodoo. This was accomplished after having first spent a few hours in my tent as the heavens unleashed a rain and wind storm, which abated around 2 PM. I found the hoodoo and also the wash that leads to the location of the climb out. Good that I had looked at Nic's map carefully, the wash is narrow and essentially vertical all around, except for a ramp some 15 yards wide. You really have to turn your head the right way to see it. I had barely found it and determined that I could and would climb this thing when the next downpour was unleashed. I decided to call it a day, found myself a spot big enough to place my tent on outside the wash and spent the night there being pummeled by the wind.


Next morning I climbed the slope, made my way through a narrow and very loose patch of dirt and rock, contoured left onto another rock and dirt slope until I reached the cliff band on top and found a way to climb through that. On top an old road was nearby which led me to Butler tank and then to the Crescent Creek road. The road walk is exactly as tedious as I remembered from 2019. The wind was rather unrelenting and my determination to take the summit route took a beating as I got higher and higher up the mountain. When I reached the branch in the road where the decision had to be made, right to Wikiup Pass, left to Copper basin, I took the easy and responsible path, or so I persuaded myself, not to pass over the summit.
Shortly before I reached Copper Ridge I stepped out of the protection from the wind that terrain and vegetation had provided and I felt vindicated. The wind was just howling and as gusty as it had been every afternoon into early evening every day of the trip so far. Not a time to be on an exposed rocky ridge as a solo hiker! I retreated a bit back in between the trees to camp for the night in order to make it across the more exposed terrain in the morning when the wind was likely not going to be that bad.
This worked as planned, but my water supply plan went awry. At Airplane Spring, the site of an airplane crash in the 1950's, there was no water. At Box Spring there was no water. At the bottom at Sweetwater Creek there was no water. In 2019 all of these sites had had decent to good flow, this year sweet bugger all! Looking at my map I noticed a spring shown halfway back up the mountain, which I had either proudly or ignorantly walked past on my way down. So up the hill I went and to my delight found a tire tank filled with good-tasting cool water. There was some green in it, a left-over from maybe the local St. Paddy's day party by either the ranchers or the cows, but that was easily avoided. I camped in exactly the same location as three years earlier where the King Ranch Rd crosses Sweetwater Creek, protected from the wind in the trees. Late in the afternoon the resident herd of cows and calves passed by, suggesting that there must be another source of water nearby as cows are usually within a mile of water. Earlier I had looked for cattle, but had not seen, heard or smelled them and hence had walked up the hill to get water.

Next morning I headed over to Tarantula Mesa and crossed over. Against all odds there was some water in the first collection site by the side of the road, something I would not have bet on. It was a gorgeous, sunny and cool day, ideal hiking weather.

As I stepped off the ranch road to walk cross country to the point where you can get off the mesa I made a bit of a bad rash decision. The way to go is to stay high on the ridge and descend to the left in the immediate vicinity of the notch that gets you down off the mesa. I left the ridge too early and had to cross a seemingly endless number of washes to reach the "magic spot". On the opposing wall of the mesa there is a big patch of "freshly" exposed greyish rock and you need to be past that to be in its vicinity.


The descent was pretty much as I remembered, two steep chutes with loose rock and dirt connected by a ledge that is easily traversed. I again pitied the longitudinally challenged as I had done three years earlier. I really do not know how short people get down this thing.
At the bottom I followed the wash and then stepped up onto the meadow below the mesa. Hugging the bottom of it I soon found the buffalo/human use trail heading West. It goes up and down, often rather steeply, across dirt and mud slopes with some amazing sights along the way. I had planned to use Jamal's alternative and spent some time making that happen. Even if you have his GPS way point, it is easy to be on the wrong side of a ridge in this intricate landscape. So here's the deal: at some point you are heading diagonally up a dirt slope/ridge with a cairn at the top. I encourage you to continue as there is some neat geology on the other side, but then to return over the ridge and step onto the plateau to the East of it. Head to its southern edge and there you'll find the ramp that Jamal is talking about. "Well, I'll be damned" is what I said when I saw the ramp because the edge of the plateau did not at all look like providing a way down to the next level. And then there it is all of a sudden!


There is some straightforward scrambling to do to reach the wash to the West below where even this year water was flowing. The bottom is pretty much trampled by cows, but that's the only water around for a significant stretch, so of course the cows go there. I camped above the wash bottom in a light breeze to get away from the bugs. The water, despite the cow shit, was good tasting and easy to filter.
Next morning I climbed up onto the ledge heading South and then West. There's a cow highway there that is easy to follow through the debris and rockfalls and you easily reach the dryfall at the back of the wash that comes in from the West. I was not entirely clear how to proceed from the dryfall. You find yourself in an area where several washes converge, which is a bit confusing at first, but then I saw the pinnacles that Jamal shows in one of his photos and I was certain to be in the right place, though I did not quite see/know how to get one level up. I latched on to a cow trail and wouldn't you know it, the cows know how to get out and up! I ended up on the plateau after climbing easily through the top of the cliffs and found myself within twenty yards of the use trail of the standard Hayduke route. Just great and highly recommended!

Wash with the only water for miles and miles


Some peculiar rock formations along the way

Following a cattle trail above West-pointing canyon

Cattle trail on shelf above wash

Dryfall in West-pointing side canyon

Columns signifying Jamal's exit canyon
Looking back in awe on the exit
Heading generally SSW I found my way to Swap canyon with some trial and error. There is an array of washes, depressions, hills, trees, ridges to find your way across, through and over. Just be patient. There are cow trails there, but the cows are not on the Hayduke, so you need to be judicious when you follow them. I had looked at the descent into Swap canyon on Google Earth and figured a way it was likely going to work, descending to the right of the ridge pointing into the canyon. In actual fact, you descend to the left, guided by some cairns. Seems like I am not getting any better at the Google earthing.
Swap canyon is fairly grassy and wide at the top and then narrows and digs in deeper and deeper. Water appears, but it did not look too enticing. I did not have to test it as I had enough water left from the wash below Tarantula Mesa and I also had a generous amount waiting for me at the cache I had placed near the mouth of Swap canyon. The canyon is something you just have to get through, not particularly attractive and hotter than all blazes.


Capitol Reef NP to Escalante
The cache was undisturbed and I loaded up with water and food for the stretch to Escalante. I dumped some trash and excess gear that I had thought I might need for the Henrys and then headed for the Notom road. I debated whether to take Lower Muley Twist canyon as had been my plan or whether to take the short route via Grand Gulch, eight miles vs. three. Since I was schlepping five days of food and eight liters of water, expediency won out over ambition. At the Lower Muley Twist trailhead I chatted with two older couples, who kindly plied me with some fruit and cold drink, and then made my way down to the Southern terminus of Lower Muley Twist where it breaks through the cliffs and enters Grand Gulch. There I camped for the night.
Next morning I found the break in the Eastern Circle Cliff wall that allows you to climb out of Lower Muley Twist canyon towards the West. It is part of Jamal's route from Lower Muley to Choprock canyon. The first hundred yards are easy and then you start scrambling over a series of rockfalls and dryfalls for a good hour. Your sight line at any time during this stretch is about five yards, it's just relentless.

Exit from Lower Muley twist canyon
 The exit canyon from Lower Muley Twist


Eventually you get through to the wash in behind and can walk up to the ridge that Jamal shows that allows you to climb out. It looked steep on Google Earth and indeed it is. It is also loose shale and not at all easy to get a foothold on. I soon moved over to a ridge to the left that had more dirt and rocks than shale and was easier to climb. I do not know exactly where I went wrong, it may have been at that point already, or higher up where I got onto a ridge running SSE rather than West without paying attention to the fact that I was doing so.
In any case, once I had reached altitude I found myself way too far East, essentially more or or less at the back of the Circle Cliffs. I should have just taken a bearing and followed that. Instead I had followed a path that was determined mostly by the ease of walking. The path of least resistance is the one to take as long as it points in the right direction! The fix was not too difficult. I could see the scree slopes I needed to get onto and there was a mud cone/ridge that would get me over there. I would have had to climb this stuff anyway had I taken the correct path, I had just wasted some time by not paying attention to map/GPS. At the top of the ridge I saw residues of an old road and following that I got to the old mining road at the top that heads South towards Deer Point. Reaching it and then following it South had been the goal anyway, so all was good. While there was one track of an ATV, the road is evident only as a straight cut through the trees. The ground is soft with scree covering loose dirt and sand so that you sink in with every step. Close to Deer Point I found my way into a wash heading Southwest then West. Jamal shows that he entered it further West after contouring below Deer Point, but I cannot see a compelling reason for doing it that way. The wash goes every which way for aways while descending slowly with dryfalls. This year these were truly dry. Even deep sandy "pools" below dryfalls were bone dry.


The water situation become concerning yet again and I diligently scraped the bottom of every pool with my heel in the hope of finding at least some water deep in the sand, alas to no avail. In the middle section of the wash there was some slickrock and in one spot I did find a pool with about five gallons of water. I had a pool party immediately, filtered some, drank some and filled my bottles with two liters.

I camped further downstream in the wash where it provided some shelter from the wind and next morning made my way over to Colt Mesa. There's a maze of washes below the mesa, running every which way and some of them are very deep with steep rims. You need to get very close to where the mesa emerges and then head West to get around the canyons and washes that start near the mesa. Eventually you hit an old road that takes you to an old mining adit, just East of the Moody Rd.. There are some concrete foundations left and an old wooden rock chute, probably used to break up bigger rocks into smaller fragments.
On a lark I headed over to the West end of Colt Mesa where Google Earth had shown some cow tanks. I did not really expect to find any water there. So imagine my surprise that one of the metal basins had some greenish liquid in it! Even better, it turned out that the basin was once fed from a piped spring. While the hose had been disconnected and capped, it had been done sloppily and a thin stream of water escaped from the hose. I love shitty maintenance like that!

Basins below Colt mesa

Looking West to Choprock canyon, there is a dirt slope of maybe 300 ft height leading to a plateau from which you can descend into Choprock canyon. The slope is rather steep and loose with a cliff band on top that one has to get through. From Jamal's maps I know that he goes South for about a mile on the Moody road and then climbs up near the prominent butte on the Southern end of the entry into Choprock canyon. I had hoped to avoid the road walk and looked for an alternative ascent closer to where I was sitting. I then narrowed the possibilities down to about three near Colt Mesa. As I got nearer to them two looked like a stretch, but one appeared viable and it was. It's a rockfall of grayish rock that you wind your way through and up. It's a bit rough, but not technically difficult. At this location the top cliff band has eroded away, so you do not have to deal with it.


At the top you find a single track coming out of Choprock canyon heading over to Silver Falls Creek, part of a popular two day loop hike. I followed it and some old roads into Choprock canyon. The top of Choprock in my opinion is a miserable hike. The canyon is not named after Jimbob Choprock, but after all the chopped rock that fills the wash. Not much to see at the top and hotter than all blazes. In mid-canyon there is a seep providing great water, kind of unexpectedly, and really the only water in the canyon that you might want to drink. Lower down there is some in the creek bed, but everybody visiting the canyon has to slosh through it, so it's not that attractive as drinking water. I camped downstream from it behind some giant rocks to be protected from the wind that pushed up from the mouth of the canyon. As the canyon narrows it is spectacularly scenic and I can see good reason to come up from the Escalante to see the narrows. But the entire thing? Meh!


I was happy to reach the Escalante and the limitless supply of water it provides. I had hiked from Fence canyon to Harris wash during one of my Escalante sundries before, so I knew what to expect: stream crossings and scrambling up and down the banks through tamarisk and Russian olive. Pretty straightforward. Two groups were coming the other way, but once I had passed them I had the Escalante and Harris wash to myself. No bovines in the wash, although close to Harris trailhead the creek bad was badly trampeled and covered in cow shit.
The road from HITR road to Harris trailhead has been redone since November and it's really good now. I took it to the corral to check out the spring shown on the map. There is indeed a flow of water but the cattle rule the roost and I doubt that that you can collect decent water.
From the corral I made my way down into Harris wash again and then turned upstream once in it. At first it's really wide, but then narrows up considerably as it winds its way through the red rock cliffs. The entire wash is firmly in the hand of cattle ranching, requiring you to cross several fence lines. Nonetheless, it could be pretty in the Fall when the cottonwoods are turning yellow. The wash is deeply sandy, so the walking is somewhat strenuous.
There was a lot of traffic near Zebra and Tunnel canyons, but it all came from the trailhead on Hole-in-the-Rock road, so once I was heading towards Big Horn canyon I had the wash to myself again. I exited at Harris wash trailhead, found my cache undisturbed and started walking towards Escalante town along the HITR road. Within ten minutes I was riding in the back of a pickup truck of a young couple who took me to Highway 12 where they turned East. I had hardly started walking along the highway when a fellow Hayduke hiker stopped to give me a ride to town. His strategy is to have his truck at a trailhead/town, hike a few sections and then get back to his truck, drive up the road, rinse and repeat.
It was great to do some laundry, especially washing the gross socks and actually throwing out one pair that had acquired too many holes. I liked the change from trail food, especially some fruit, however limited in Escalante town. Unsurprisingly, the rangers at the interagency center did not know much/anything about the conditions up on Fiftymile Mtn.. I briefly toyed with the idea of renting an ATV to cache some more water up there, and it turned out later that that would have been a good idea, but the technicalities and my hesitancy to use a device that I otherwise detest got in the way.
As I left at noon from the Outfitters there were groups outside who looked like Skurka clientele and as I found out later, they were indeed. Sad to have missed Jessica, who was guiding for Andrew, but I did not see any guides I was familiar with. I walked down to HITR road, unrolled my sign for Hurricane wash and waited for about four hours before I got my first ride to Zebra and Tunnel canyon trailhead. I walked on to find some shelter from the wind to either camp if another ride were not to materialize or at least not freeze my butt off while waiting for said ride. At Zebra and Tunnel canyon TH I had seen maybe six cars. There was almost no traffic further along the road, so it was looking grim. After a long wait a van with two couples pulled up who were heading to Egypt trailhead. One of the couples was also on the Hayduke. Vans are usually not promising for rides, but who is riding in them is obviously more important than the type of vehicle to determine whether or not you will get a ride.
Escalante to Highway 89 via Fiftymile Mountain
I camped near the road to Egypt trailhead and next morning started walking along the HITR road. After a while a French-Canadian woman in her Sprinter stopped and gave me a ride to the Lower Dry Fork trailhead that allows access to Peekaboo and Spooky slot canyons. Interesting woman, a retired physician traveling the world. Since there had been very few cars at either Upper or Lower Dry Fork trailheads I continued on foot, figuring that the eight miles to Hurricane wash would go by eventually. However, I got lucky when a group from Arizona heading to the very end of HITR road gave me a ride for part of the remainder so that I reached my goal by about 2 PM, some 24 hrs after I had started hitching at the junction of Hwy. 12 and HITR road. This is in May! Imagine trying to get a ride in March from Hurricane Wash to town or back!
I refilled my bottles at a basin near Hurricane Wash TH. Walk the road in direction of town and then follow a ranch road to the right. After 100 yds you find a giant metal basin with clean water. I then ascended Fiftymile mountain along a ridge that starts pretty close to the trailhead. There are actually two ridges and you should take the left one, looking towards the mountain. If you take the right one, as I had done arbitrarily, you will have to make your way over to the left near Cottonwood springs and you'll be losing some of the precious altitude you have gained up to that point. The left ridge has some cow trails and climbs straight up the steep sections as all of these trails do. It's reasonably easy walking overall. As you get closer and closer to the cliffs the guessing game begins about how the trail climbs through the cliff face and most of the time you only see it at the last moment. In the cliff face the bedrock has seen some work to make it passable for horses and you can see horseshoe marks on the rock. Then, all of a sudden you are on top and can enjoy the view across the plain that HITR road runs through over the Escalante to the West side of the circle cliffs, some of the way that you have come so far.


I headed Northwest off-trail to reach Wind/Window rock. I had not understood why it has this peculiar name, why Wind/Window? I found out, as the wind was blowing hard and cold through the frame of said window and I did not hang around for long.

Wind/Window rock on top of Fiftymile Mtn.

View from Wind/wWindow rock in the direction of Escalante town


View from Wind/Window rock East over the plain that HITR runs through (green) to Escalante river area (red) to the Henry mountains
My next goal was Mudhole spring, according to the map located in a depression about a mile from Window rock. This was a cross country affair again, first getting through a wooded area, then over a plain covered in sagebrush past a ridge to my right, then past the Western tip of the ridge into another forested area. At this point it was starting to get dark and I relied more and more on my GPS to guide me. Eventually I started to see aspen, which I recalled from photos to be prominent around Mudhole spring, then a hunter's camp, then the fence enclosing the spring and the hut nearby. I passed through the gate at late dusk, found the basin that collects the water from the spring and I was "home" just in time.
Although bone-tired I filtered as much water as I would be able to carry the next day. I expected the night to be cold and I wanted to avoid having to start the next day with hands ice-cold from handling water. It was indeed freezing overnight, as in "the water in the bottles was frozen". Good thing I had placed the filter in my sleeping bag!
Next morning I started out in search of the entry into Monday canyon. This day started the way the previous one had ended: finding your way though pine and pinion forest, crossing sagebrush plains, crossing some drainages against the grain of the landscape. The top of the side canyon into Monday canyon is a dryfall and you just follow the wash down. There was a small water flow in the upper third, but after that it was completely dry. The wash throws some challenges your way, first some dryfalls, then some deadfall and lastly deadfall in dryfalls. Tedious! Little did I know!
If you read Jamal you get the impression that Monday canyon is a stroll in the woods with one major dryfall in it, at least that was my interpretation. Nothing could be farther from the actual situation. Monday canyon is actually a never-ending series of dry- and rockfalls that require your undivided attention every step. There is one major dryfall, about 12 ft, that you can climb through on the left. Then you reach the 15 ft dryfall and you climb around on the left. Jamal has this little joke that you have to climb several hundred feet, but it really is only about 30 feet. You then can descend through a scrub oak thicket back into the drainage. I suggest you do this without pack and lower it instead from the top of the dryfall. Apart from this latter dryfall I felt entirely mentally unprepared for what I was dealing with and my time plan for the day flew out the window very early.

There is a reason that Andrew in his map sets lists altitude differences between his way points. Had I looked at the altitude differences in Monday canyon beforehand I might have been able to figure out that Monday canyon loses considerable altitude over a relatively short distance. This could have told me that it was likely going to be dryfall and rockfall city. Alas I had not done the work (my bad!) and so I got caught with my pants down.
Slightly below the 15ft dryfall I found a small seep in the drainage and farther down one pothole filled with tea-colored water teeming with life. I did not bother with the latter, but I refilled my bottles at the seep. At Window Rock I climbed out of the wash to the left as suggested by Jamal to get around some of the major dryfalls in the drainage.

Window rock at the bottom of Monday canyon
In the beginning there was a cow trail on that left bank slope but that braided pretty quickly and then it was just a free-for-all scrambling across drainages coming in from the left. By the time I got disgusted with the difficulty, the main drainage had flattened out and there were dryfalls and rockfalls to get through and over only every fifty yards (imagine that luxury!) and I descended down there.
At the junction with Rogers canyon water was flowing and luckily I was not deterred by online trip reports from purifying some. I had not seen, heard or smelled bovines and, in fact, would not be seeing any all the way down to Navajo canyon. The water does indeed have a distinct bitter aftertaste, but that's just part of the course for my embittered take on this part of the trek. I cut the Rogers water with some of the water I still had from Mudhole spring and that made it easily potable.


In Rogers canyon
Rogers canyon has again a whole string of dryfalls and rockfalls that have to be overcome. In addition at some points you feel like being in the Atacama desert, walking on pure salt crusts. Eventually the canyon flattens out and you walk in a dry streambed, flanked on both sides by tamarisk. As you look for the shortcut that gets you into Navajo canyon, be patient. There is a use trail that goes up diagonally a mud/dirt slope. Trying to get over to Navajo earlier appears to me to be a lot more work than you need to do. I tried going up wash in grey mudhills but turned around and found the proper way out a few hundred yards further downstream.

Mud hills at the bottom of Navajo canyon
The bottom of Navajo canyon is a cow-trampled, parched, shadeless, sun-drenched, deeply sandy
hellhole. After a while it narrows up as you make your way through the coal seams and then you do the reverse of what you did in Monday canyon, you climp up the dry- and rockfalls, one after the other. At some point in a major rockfall area you will see a cairn at the mouth of a side wash to your left. Its placement is a tad ambiguous, but you should walk up this side wash and not continue straight ahead, even though the map suggests that you should be able to take left higher up.


Lower Navajo canyon coal seams
Next you come to the Navajo slot canyon narrows which feature some neat erosion patterns. You first reach the dryfall that's featured by Jamal. You can easily climb around it on the right (LUC) and shortly thereafter a giant slab plugs the entire width of the narrows. You can climb out on narrow ledges to the left (LUC) on somewhat crumbly white sandstone. Upstream of this obstacle there are no further significant hurdles to overcome until you reach Surprise valley. Just below the junction with Surprise valley there was lots of fresh foliage in the wash, suggesting that there is water deep down, but none that I could access. I walked up Surprise valley for a god bit in search of the seep Jamal mentions, but to no avail. There was nothing.


Leaving Surprise valley I climbed up the road up to the Croton road, followed that North for about half a mile until I reached the road that Jamal suggests to follow down to Reese canyon. I had a decision to make here as I was down to 1.5L of water and consideration had to be given to the question where the next water would be coming from. Jamal mentions a seep in Reese canyon, but the term "seep" always implies a not so great flow. Would the seep be seeping this year given the drought? The alternative was to continue along the Croton road hoping to run into a member of the ATV crowd who would be willing to share some water. If push came to shove I would have to walk all the way to HITR road to make human contact. I was sitting in the shade of a pinõn tree as the sun was beating down trying to make the decision in the absence of any real information. Eventually I decided that the sparrow in the hand, i.e. a potential seep within a few miles, was better than the pigeon on the roof, i.e. human contact in ATV country or a walk all the way to HITR road.
In the end it turned out that I made the right call, but it was not as straightforward. I descended along the ridge into the wash below that leads in a generally Western direction towards Reese canyon. In the location where Jamal shows the seep the sand was indeed wet, but when I created a scratch in the dirt with my heel, only the tiniest flow of water was noticeable in the bottom of the scratch, a flow of maybe 1mL/min, if that, of rather muddy water. If I were to process that I would at best be getting half of it into my filter. So this was not going to be the solution to my problem.
I next checked out various dryfalls in the area in the hope that at the bottom of one of them there would be a pool with water, to no avail. Either there was no depression in the ground for water to collect or there was a depression, but one without water in it.
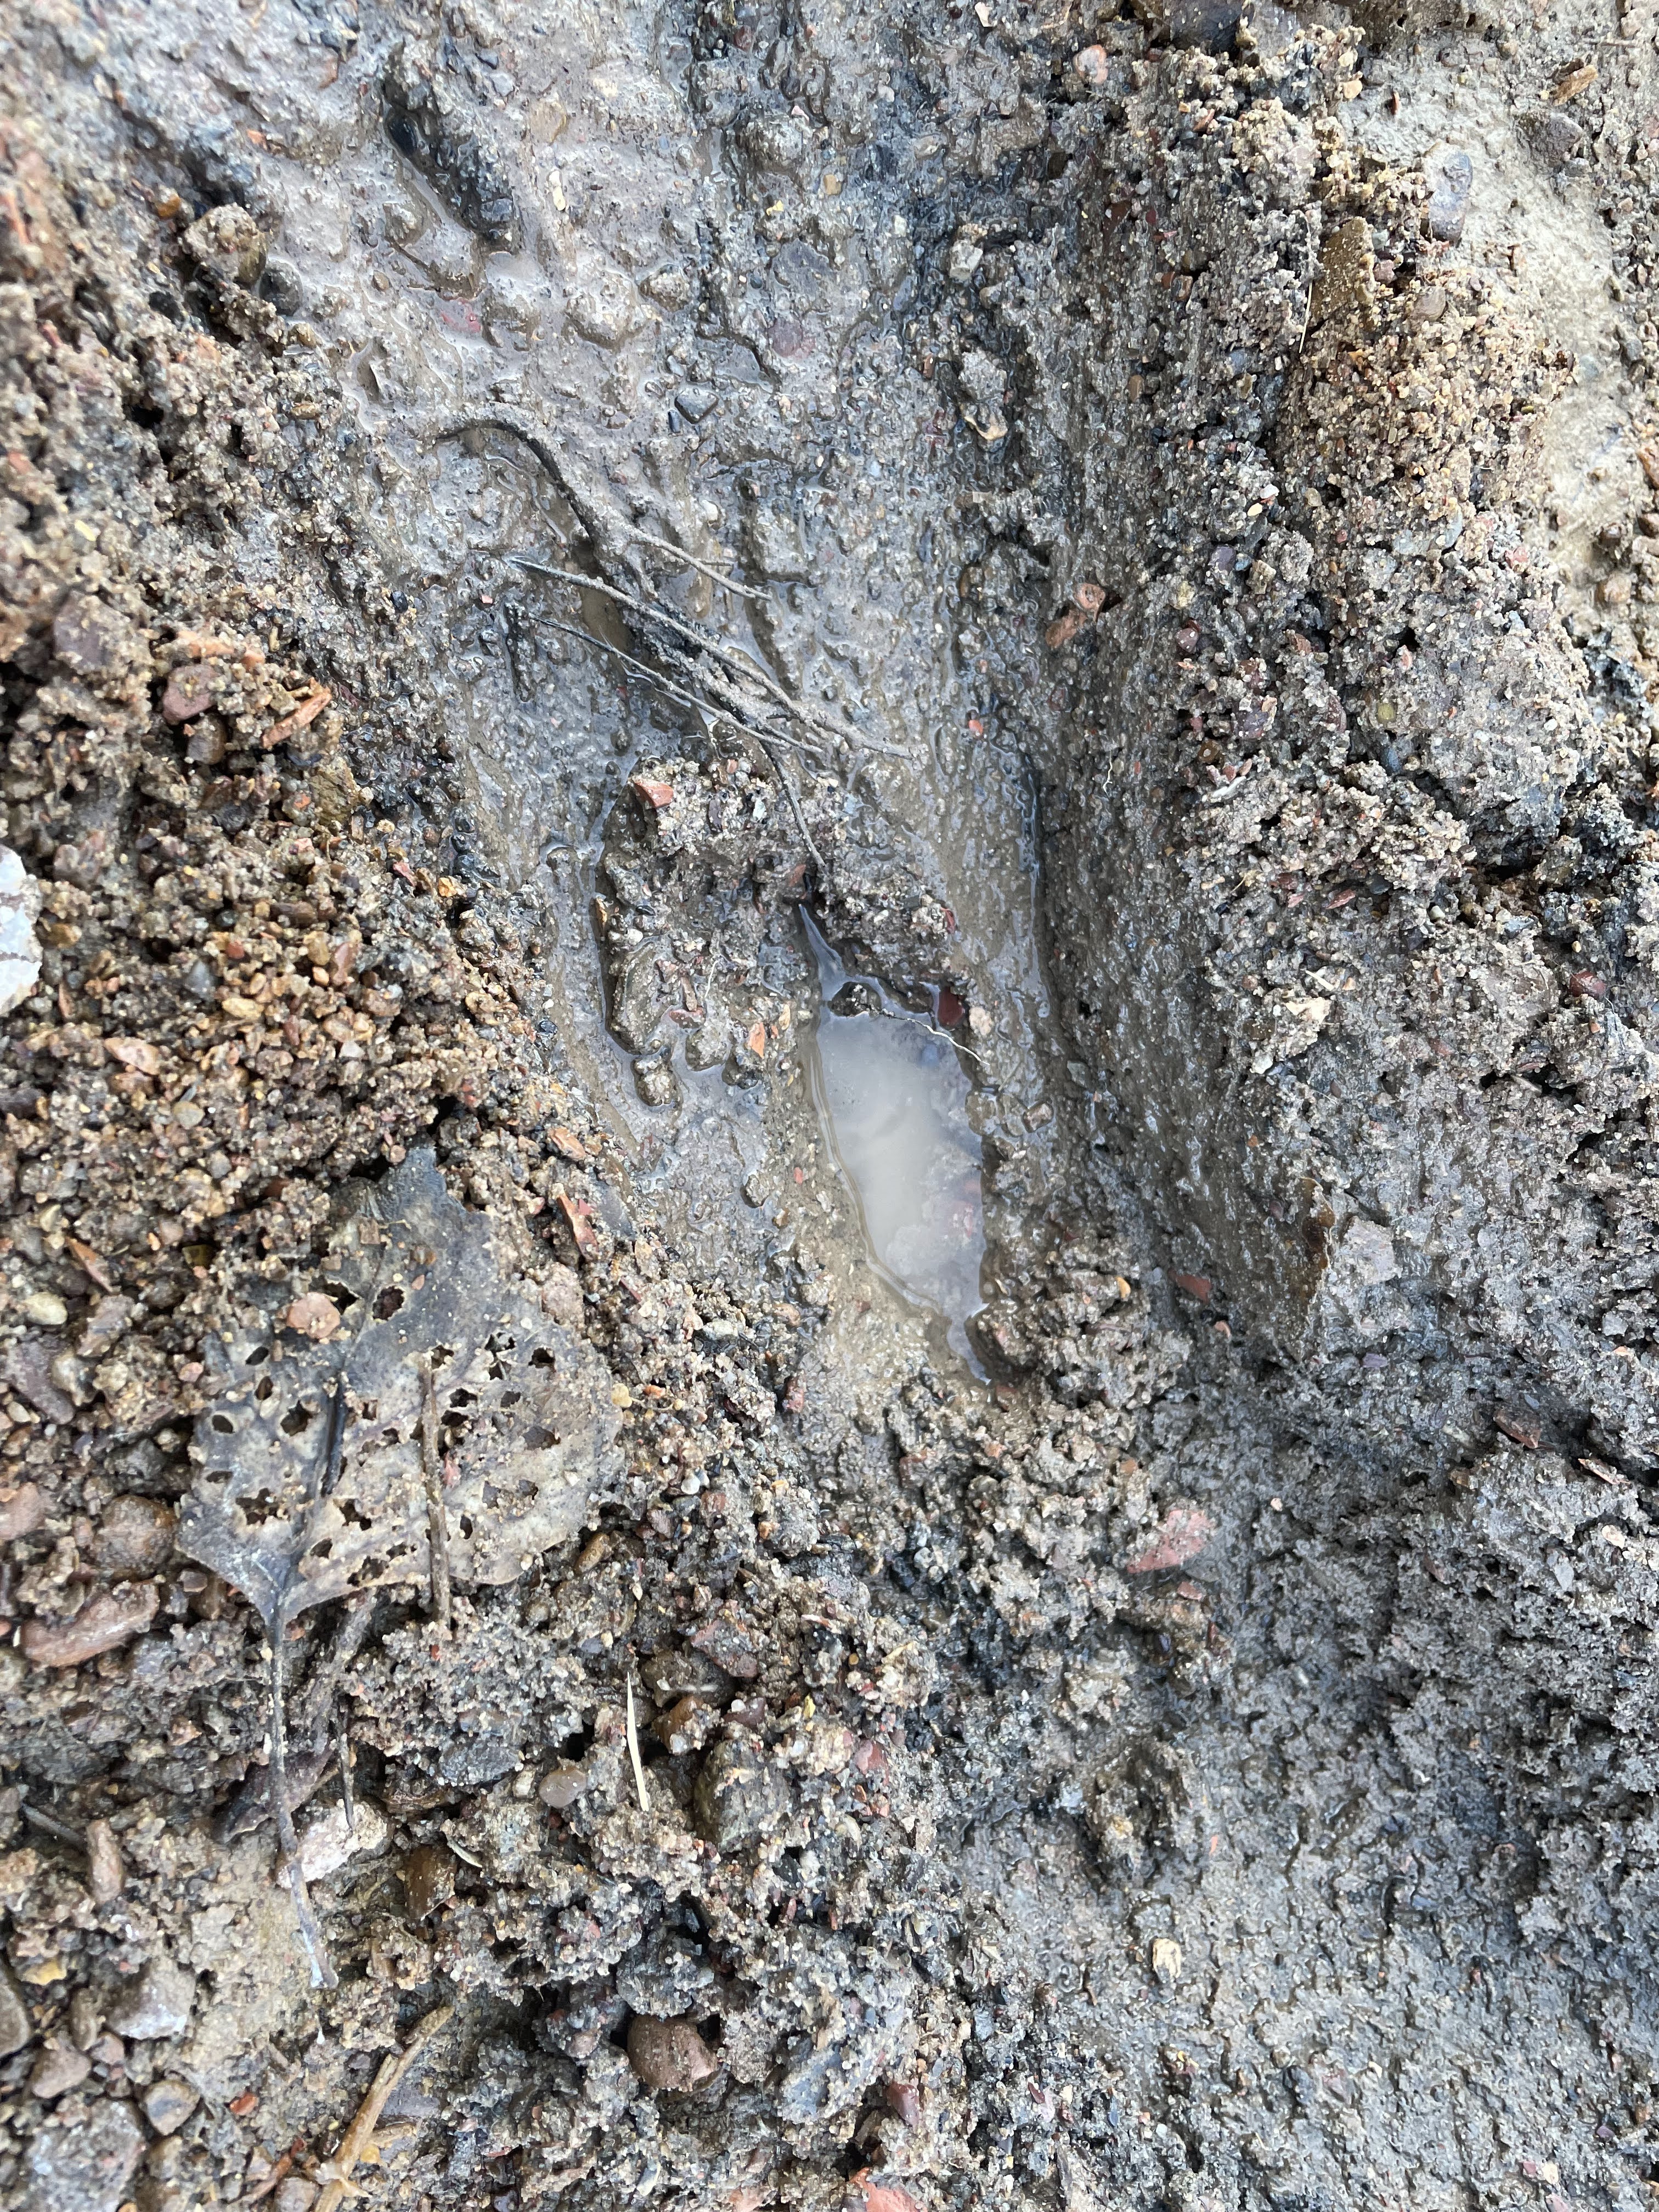
I was not panicked, but I have been more comfortable. I could probably have just eaten a granola bar for dinner, used minimal water through the night and hoped for better luck on the other side of the ridge separating Reese canyon from Last Chance wash. Heading downstream on a relatively fresh cow trail, weeks or months old maybe, I came upon another seep (as it turns out), but what I first saw was dark mud, heavily contaminated by cow shit, badly trampled and stinking of ammonia to high heaven. So there was water, the most disgusting water I had seen on the entire trek this year, and I needed to figure out how to make this palatable in the sense of the word. It was a prime example of Château Bœuf. Closer inspection showed that there was a shimmer on the water suggesting that there was flow in this mud hole/shithole! I then tracked down the source of this flow and to my delight, at the side of the shithole was a depression in the rock where the water was seeping out of the rock. The depression was maybe a quart Ziploc bag wide, good enough to collect easily. My day was made!

The Château Bœf seep further downstream from the seep shown above

Looks promising, right?

This is the little pocket on the Western edge of the seep that provided the clean water


The water was cold, clean-tasting and easy to collect. Within half an hour I had four liters filtered and downed an additional half liter to make up for the shortage I had endured during the day. I camped downstream but relatively close to the seep so that I could fill up once more in the morning. I drank liberally all evening and night, filled my bottles again in the morning after breakfast, leaving the seep with six liters. Ugh!
The classical Hayduke route goes down Reese canyon to its junction with Last Chance wash and then cuts over into the latter. Jamal has described a climb over the ridge separating Reese and Last Chance, cutting about four miles at the expense of a couple hundred feet of climbing. I chose Jamal's route and at least the ascent was straightforward. The right wall of Reese canyon has a wash coming in from the right. It is important that you climb out downstream from this wash. The mud hill upstream looks doable at the bottom, but you run into problems higher up, out of sight from the bottom, as you attempt to cross the crest of the ridge. No such problem exists once after you have ascended the downstream mud hill, at the top of which a smooth ridge points West to the North-South main ridge. I happened to choose the correct hill to climb by happenstance


A look back to where I had come from the day before

Getting down the other side was another thing. Jamal had come the other way and his maps show that he started climbing out of Last Chance where it veers East. Looking down from the top it looked as if one would have to cross several washes and gulches to make it that far North. Not attractive! Looking for alternatives I studied the terrain immediately below me. There are a bunch of cliff bands that you do not see right from the top, except for the top one. I chose to go left a bit meandering through the cliff bands wherever they had eroded the most and did not require climbing moves. It's steep and loose, a mixture of dirt and rock with some scree sections. This got me down to about 100 ft above the Last Chance wash where a significant cliff band blocked my progress. Some exploration suggested that I head right, cross a wash and get on a ledge which further to the right had a weakness that allowed me to get one layer down and another weakness even further to the right got me onto a mud slope that I could go all the way down to the bottom of the wash near a fairly substantial cottonwood tree on the Eastern bank of the wash.
There was water flowing in Last Chance wash and as I headed up the wash I crossed the water an infinite number of times, or so it seemed. There are significant salt crusts in the stream bed, Epsom salt (MgCl2) from the looks of it. It was of no concern to me as I still carried water from Reese canyon. I should mention that during the day I experienced some laxative effects from the water collected in Reese canyon, so there was some Epsom salt in that water as well.


Last Chance wash had extensive salt crusts in the wash bottom. Their significance for the potability of the water flowing in the wash is difficult to ascertain. The crusts form as a result of evaporation of salt-containing water on the surface of the sand. Capillary action draws up more water as the evaporation takes place and leaves the salt behind. It is therefore not correct to assume that there is a 1:1 correlation between the extent of salt crust and salt content of the water. On the other hand, salt crusts do not form in washes running with water not containing salt. The only way to tell the salt loading of the water is a direct assay/test of the water and that's beyond the casual backpacker's toolkit.
After crossing the Croton road that in turn crosses Last Chance wash I continued up the latter to reach Paradise valley. It is nicer than Last Chance, paradisical is however not the exact term that came to my mind. I camped in the wash and next morning continued up the valley until I reached the "tower", a round pile of rock in the middle of the wash, which signaled to me that I should be exiting to the left to visit a dryfall in a side canyon that Jamal had recommended. It was straightforward enough to reach the dryfall and it was a worthwhile diversion. I then climbed up the steep and loose canyon wall to reach the plateau on top which allowed me walk along the slot canyon to where it starts. From there I continued on towards the West cross country in a wash until I could climb out and reach the road that led me to Fourmile canyon.


I had cached some water by the corral at the top of the canyon and I sure was pleased that I had. I just had not cached enough water. Two liters went down the hatch in short order. I should have cached six liters, two to drink and four to take!
The wind was absolutely howling and I did not linger, preferring instead to descend into Fourmile canyon to have some protection. It was pretty awful. The banks on either side are smothered by mostly dead tamarisk bushes that make it basically impossible to walk on the banks at any reasonable speed. You get pushed down into the wash and that is muddy, filled with iron-laden brown water, cow shit and other decomposing detritus. That passes eventually and the canyon opens up as you reach Tommy water canyon. I found a cluster of pinion trees that sheltered me a little bit from the still howling winds and the tent stayed up as long as I weighed down the stakes with substantial rocks.
Next morning I walked down Tommy Smith canyon to Wahweap canyon and further South in it. These are giant washes, heavily impacted by cattle, but really easy to walk in at a decent pace. Chynoweth canyon was easy to identify and enter. Shortly after you pass the mouth of it, the canyon divides into two branches and one is to take the Southern branch, which again will split shortly into two. At the latter branch point I dumped my pack and headed up the right branch heading WSW in search of the spring supposedly located there. I did not see any water and continued only far enough to ascertain that climbing out at the back of that branch was going to be a challenge owing to a cliff band at the top. Returning to where the Southern branch of the canyon split, I looked into the South-pointing branch and started to conceive of a route that would get me out. The Eastern wall was steep and rocky without offering a clear path. Moreover, once up I needed to head West, so taking the East wall did not seem right in the first place. So what about the Western wall of this side canyon? There were three major cliff bands that one would have to overcome, but closer inspection showed that one might be able to do so in different locations, making use of weaknesses in each. Climbing up in a westerly direction right at the junction of the two side branches got me to the bottom of the first band and without pack I could get up and pull up my bag with the throw line. Contouring and climbing slightly in a southerly direction got me close to the second cliff band. This was a bit more formidable, both because of the height of the band and the kind of moves I had to make to get through. It was at the limit of what I was comfortable doing, but it worked without pack and there were locations where I could pull it up. Then came a long contour below the top cliff band to where it turns in a dogleg right direction heading into a shallow bowl pointing Southwest. This has a weakness in the top cliff band which got me on top. That was entertaining! Heading West towards the 4 x 4 road necessitated some more scrambling and some evasive action around slickrock bowls with steep rims, just regular cross country stuff.
The rough road describes a wide berth around Coyote Butte, going up and down and every which way. A road junction not shown on the maps allowed me cut off the tip of the road pointing in the direction of Blue Cove which I did not feel a need to visit. The shortcut rejoined the road coming from the South and that road leads along the West face of Coyote Butte. There are lots of washes and dryfalls there, but all were bone dry. I had a dry camp along the road with little water left, but I did not think that I would be making it to Cottonwood canyon before nightfall. So I only had sweet dreams about my water cache at Cottonwood.
One neat thing happened as the sun was setting, a hummingbird came to check me out, from maybe 10 feet away, some 5 ft in the air, hovering there and scanning me left to right before darting off.


View of Cottonwood canyon and the mud hills from atop the cliffs of Eastern wall
As the road approaches the cliffs constituting the East wall of Cottonwood canyon it describes some zigzags that one can cut off by scrambling across the washes separating the legs of the road. It then climbs up to the top of the cliffs forming the East wall of Cottonwood canyon from which it descends really steeply on mud cones to the Cottonwood road. I found my cached water that I had placed there in October and I enjoyed the clean tasting water. Alas, I just should have cached more! A recurring theme in Spring 2022.
I then walked the Cottonwood road South towards Highway 89 and the White House trailhead. Of the many cars passing me on the road in either direction, two offered me water, which was very kind and needed. I then left the road to descend into the Paria wash. I got this more or less right by accident. As I walked up to the bank of the river I was faced by an almost vertical mud wall some 8-10 feet tall above the flood plain. Walking a couple of hundred feet North allowed me to get to a point where I could climb down. If you wait too long to get into the river bed, you are going to be cliffed out.
The Paria river bed is heavily impacted by cattle but the walk is otherwise quite pleasant. About a mile from the highway there is a ranch that claims a sizable part of the river bed for growing feed and grazing. There is also a mining operation. You get around both near the left bank, but you'll have to climb over or crawl under a few fences. These obstacles notwithstanding, you do not want to continue on the Cottonwood road as it turns Southwest and climbs the hills that the river cuts through. You would be ending up on Hway 89 much farther West than you need to be and it's a nasty walk along the highway as cars are screaming by at 80 miles an hour.
My hiking and caching plan had envisioned that I would fasthike through the Paria narrows and climb out via the Busch Head route to the top of the Vermillion cliffs. I would be crossing over part of it and climb down close to the Black Ranch road and then hike that (ugh!) to the Nankoweap trailhead. After experiencing the lack of water across Fiftymile Mtn., I could not persuade myself that I would be finding water at either Busch tank or Joe's tank on top of the Vermillion cliffs, nor did I have reason to believe that given the prevailing gale-force winds that putting up and keeping upright a tent on top of the cliffs was going to be possible. I therefore decided to drop out and return either this Fall or next Spring for the Grand Canyon sections.
Despite all the tribulations this year, I enjoyed the hike and I think that enjoyment will increase retrospectively as the acute memories of the hardships fade, typical Type 2 fun. I again very much enjoyed the quiet, the solitude, the fabulous night sky. The latter even though I did not get to do as much cowboy camping as in previous Utah outings owing to gusty winds. I mostly took the opportunity to gawk at the heavens during mid-night biobreaks.
An entirely bonus came my way on the flight back when I flew over the stretch of country I had walked. It was a gorgeous clear and cloudless day and I could identify one landmark after another. When you are walking down there in fly-over country you see the contrails of planes during the day or the red flashing lights at night, planes going every which way. This flight afforded me the opportunity to look the other way. So cool!
Fall 2022: The Completion
Highway 89 to Nankoweap TH
I had reluctantly aborted my Hayduke completion in Spring ’22 owing to the drought. Lack of water on the Kaiparowitz plateau had scared me all the more so as I had intended to use a somewhat unusual route to get from the Paria to the Nankoweap trailhead, namely via crossing the Paria plateau. Since this is a seldom used route, there was little intelligence available as to the water situation up there. It later turned out that this had been a good decision as Bush tank had been dry during Spring ’22 as reported by Jamal at Across Utah.com.
Returning from the Sierra High route I more or less idly checked for permit availability for the Paria canyon and there happened to be a slot in late September. So I pounced, bought a permit and submitted a permit application to the Grand Canyon Backcountry Office which ultimately was approved. There had been heavy monsoon rains during summer which made me optimistic that a crossing of the Paria plateau should be possible without too burdensome a water carry.
After caching supplies along the route I returned the car to Las Vegas, took the shuttle to St. George (UT), a cab ride got me to Hurricane and early on a Sunday morning I stood at the bottom of Highway to hitchhike to Kanab and then to the White House trailhead. This came off without a glitch. I collected my permit at the BLM TH office, got last minute information on flow rate, projected weather from the very helpful ranger and hiked down right to the border of the wilderness by the power lines crossing the Paria canyon in order to have an early start the next morning.
Added March 23: Two hikers died and one survived, barely, while hiking the Paris slot during a flash flood in Spring ‘23. Make sure you understand the medium term weather forecast thoroughly before you commit! The canyon will always be there, there is no point pushing it in dubious conditions!


The previous week there had been thunderstorm activity in the area with some rather heavy dumps and as a result all the pools in the canyon were full and there was a lot of rather slippery mud to contend with. Close to the confluence with Buckskin Gulch the water in the pools reached hipbelt height on my 6’4’’ frame while in Buckskin Gulch itself some pools were more than 6 ft deep. I pity the longitudinally challenged! In the same area I ran into one party camping at a well-used campsite on the left bank. This group had planned to do through hike of the canyon, but in view of a forecast of more rain had decided to just explore around the confluence area and then to hike back out to White House TH. As a result I saw only one two-person group in my 1.5 days of hiking in the Paria canyon, two older guys who also had decided to just do an in-and-out hike rather than their planned through hike to Lee’s Ferry. Sweet!
The Paria canyon is nothing short of spectacular with the walls reaching some 500 ft into the air with intricate curves along the course. I had a really great time and can highly recommend a visit. Close to Judd’s Hole I had an encounter with quicksand, which, as always, takes you completely by surprise and takes a good while to get out of. In my mind I heard Whitney Houston at the peak of her powers belting out “I love you so! I will never let you go!” while I struggled to get out. I was in to my knees and any attempt to raise one foot inevitably led to the other sinking in deeper. Eventually I threw off my pack higher up on the bank, grabbed a few shoots of Russian Olive and started to pull myself up. One foot was already halfway out of the shoe and getting that leg out with the shoe on took some doing. It’s a long way to hike on socks from Judd’s Hollow to Highway 89A, let me tell you!


Evening at the entrance to the Paria Canyon Wilderness
The previous week there had been thunderstorm activity in the area with some rather heavy dumps and as a result all the pools in the canyon were full and there was a lot of rather slippery mud to contend with. Close to the confluence with Buckskin Gulch the water in the pools reached hipbelt height on my 6’4’’ frame while in Buckskin Gulch itself some pools were more than 6 ft deep. I pity the longitudinally challenged! In the same area I ran into one party camping at a well-used campsite on the left bank. This group had planned to do through hike of the canyon, but in view of a forecast of more rain had decided to just explore around the confluence area and then to hike back out to White House TH. As a result I saw only one two-person group in my 1.5 days of hiking in the Paria canyon, two older guys who also had decided to just do an in-and-out hike rather than their planned through hike to Lee’s Ferry. Sweet!
The Paria canyon is nothing short of spectacular with the walls reaching some 500 ft into the air with intricate curves along the course. I had a really great time and can highly recommend a visit. Close to Judd’s Hole I had an encounter with quicksand, which, as always, takes you completely by surprise and takes a good while to get out of. In my mind I heard Whitney Houston at the peak of her powers belting out “I love you so! I will never let you go!” while I struggled to get out. I was in to my knees and any attempt to raise one foot inevitably led to the other sinking in deeper. Eventually I threw off my pack higher up on the bank, grabbed a few shoots of Russian Olive and started to pull myself up. One foot was already halfway out of the shoe and getting that leg out with the shoe on took some doing. It’s a long way to hike on socks from Judd’s Hollow to Highway 89A, let me tell you!


Next day I continued downstream to the location of the climb-out to Bush Head. The canyon opens up and you walk on slick rock for a good stretch, but even that was covered with slick muck, so I had to watch where I stepped.
I had an approximate location for where to start the climb and once you reach the spot, it’s pretty obvious as there are sheer cliffs upstream and more sheer cliffs downstream on the right bank. There is a faint use trail as you climb, then you contour to the right and make your way to a dryfall. Next to the latter on the right looking uphill is a wall with an overhang that you have to climb. I could feel one handhold, but since I am not a rock climber, I do not have the finger strength required to pull myself up with that as my entire support. So I engaged in a little civil engineering operation to build a stable rock pile that I could stand on and reach farther into the shelf above. There was a very convenient pillar that I could get my hand around and I easily got up without my pack. I pity the longitudinally challenged!

The canyons widens and there are slickrock benches to walk on

Bush Head exit


Look from the ridge back to the top of the first cliff band

The second cliff band

The chimney to get over the second cliff band

Look to the West from top of second cliff band
Once up you climb a hillside to your (climber’s) left, part dirt, part talus with a few heavily eroded minor cliff bands that one can get through easily. At the top a major cairn indicates that you are on track and minor cairns lead you to the second cliff band which is significantly taller than the first. However, there is a chimney that you can ascend easily even with the pack on. So, while taller it is easier than the first cliff band to overcome.
At the top you see a broad ridge, sandy at the bottom, covered in prickly pear cactus, that you have to ascend. Higher up sand gives way to dirt and talus until you reach cliff band #3 after having climbed about 1200 ft. This is a bit more formidable as the top of the band is covered with sizable and loose rocks. You may get up the slick rock, but how to get over the rim is the issue. I dumped the pack and scouted for something less risky. I found a chimney that was reasonable to climb once you had gotten into it and the getting into it required some large steps, but was ultimately easy. One exits the chimney. At the top one then sees a notch a bit to the right that is filled with stable talus and that gets you up another 50 ft where the slope moderates. There I found a game trail that led me higher up without any acrobatics being required. Above that area you hit deep (think basso profundo!) sand and after overcoming another minor cliff band you reach the plateau. I dry-camped there right at the edge and enjoyed the evening light.

A view East from where I came

A view to the other bank of the Paria

A view to the West in direction of Lee's Ferry

View across the plateau. Bush Head at the very left margin of the picture
Off to the Northwest you see Bush Head near which Bush Tank is located and that was my target for the next morning. It’s a reasonably straightforward walk through sage brush and grass as well as sandy patches. If you look at the map you see that Bush Tank is located at the upper end of a drainage. There is no point in going down into the drainage. It’s deep sand down there and the walking is easier on the ridge to the right of the drainage (LUC). Eventually you see the slick rock appear that is used to collect precipitation which is then diverted to a an area that has an earthen dam installed. There was lots of water (good planning, Thomas!) And while it filtered I explored a bit around the abandoned cabins. Does not look like that this was a super successful operation. I doubt that Bush and his descendants are now living a life of luxury in Florida or Abu Dhabi.

Bush Tank
I followed a deeply sandy 4x4 road (BLM # 1110) from Bush Tank to another abandoned ranch in the middle of Bush Valley at the junction of Horse Ridge Rd and Shed Valley Rd. which had at least a now defunct windmill and a motorized pump to get water out of the ground. From there I followed another BLM road (BLM #1108) to Joe’s tank, which is a spot worthwhile to visit. It is private and posted, so take water but please don’t camp there. After purifying some water I walked another couple of miles and camped under a giant piñon tree.


Joe's Tank
More walking along sandy BLM #1108, I passed the White Knolls (maybe worth a visit in the future) and then reached a short cul-de-sac road leading to a fantastic viewing point at the edge of the cliffs overlooking Walts Bench offering views across House Rock valley all the way to the Grand Canyon. A 15 min diversion which is very much worthwhile!

View from the top of the Vermillion Cliffs across House Rock valley. The dark horizontal feature in the top third of the picture is the Grand Canyon
After more walking along the sandy road I reached the approximate location of the Sandhill crack which I intended to use to get off the Paria plateau. (There is wildlife tank about half a mile further up the road. Take the first left and you get right to it) The area is surprisingly devoid of cairns, which I appreciated. I got to the cliff’s edge and after some snooping around I saw the use trail coming from below the cliff and followed that to where it butted against the cliff wall. Once you see that spot, you immediately see how you’ll get down. It is a dryfall, very steep, but filled with stable talus so that you essentially go down a steep staircase. After overcoming the vertical part of the cliff you can walk out to the right, make a hairpin curve and latch onto the use trail. The latter is easy to follow high up, but in the mud hills that are farther down I lost it.

The "head". Once near it, you are near Sandhill crack

From cliff's edge you can spy the use trail, here in the bottom third of the picture sloping upwards to the left. Where it reachers the cliff the Sandhill crack leaves the cliffs and you step onto the dirt slope.

Sandhill Crack from the bottom

The dirt hills below the Vermillion Cliffs
I improvised and followed some washes that allowed easy walking and ended up just below the corral of Jacobs Pool and near the 4x4 road that would take me to highway 89A. This road takes a course a bit more convoluted than you would expect, but there are washes that need to be crossed. You reach the highway and then have a three mile hike by the side of the highway to reach Black Ranch Rd that leads to Nankoweap TH inter alia. Two good local church ladies passed me in their car, turned around, gave me some fruit, pastries and water and admonished me to take good care of myself. So sweet!
I found my cache undisturbed, so I had my umbrella, a lot of water and food. I camped right near the beginning of the road in a rather windswept spot, but the heavens looked unstable and I did not dare to retreat into a drainage in the fear of waking up being washed down the drainage. I got some rain in the early evening but most of the water came down elsewhere.


Look back to the Vermillion Cliffs in evening light and across House Rock valley to the East.
Next morning I got up very early and walked the road to Nankoweap TH some 35 miles away. Luckily I got a ride with bunch of guys who were out for a weekend hike for part of the way. With that help I made it to the trailhead faster than I had planned and that allowed me to have an unplanned NERO day the next day. In the late afternoon I made my way to Saddle canyon TH. Be warned this does not go the way you would expect. From the parking lot you contour, then you descend steeply deep into Saddle canyon on your left and then climb not that steeply towards the TH. As I progressed the weather got increasingly threatening and I decided to camp in the forest below the Saddle canyon ridge. It poured most of the night and the lightning show over in the are of Page was something to behold. I felt vindicated in my choice.

Saddle Mountain
In the morning in a light drizzle I began to climb up to the ridge of Saddle Mountain and found the entry to the Nankoweap trail. There was a lot of fog rising out of the giant hole to my right and the intensity of the rain increased steadily. There was not a good place to maybe hide from the precipitation until I reached Tilted Mesa. I put up my tarp on the wind-swept ridge, got into my sleeping bag and waited for how this was going to develop. I needed to make a decision on whether to continue or to retreat and asked my friends via Inreach to get me a weather forecast. That suggested that the rain would die down in the PM and, indeed, it did and predicted that the next few days would be warm and sunny, which turned out to be correct as well. Late in the PM, once the rain had stopped, I continued on down the trail and reached the stream at the bottom by 6:00 PM. Everything was saturated with moisture, Nankoweap stream was running high and blood red. I camped under some big Cottonwood trees off the creek in air that surely was at 100% relative humidity.

First view of Nankoweap valley from Saddle Mountain TH

Nankoweap trail

Marion Point

First signs of improving weather

Nankoweap Creek, the right-sloping green ribbon is Nankoweap Creek
By next morning it was still damp, including my quilt, but the creek had receded and was running clear making the purification of water straightforward. As I headed downstream it became apparent that it was going to be a sunny day with blue skies as the sun rose. There is some use trail in Nankoweap canyon, but most of the walking is along a topsy-turvy stream bed littered with gravel and talus of all sizes. I reached the shore of the Colorado and then climbed across a large dune or moraine downstream. At the Southern end of Nankoweap beach a rafting party was just taking off for the day’s journey and I followed them West on the right bank along a reasonable use trail. As I learned later some river runners take some rafters on a hike up Nankoweap canyon, then climb the ridge that separates it from Kwagunt canyon, descend Kwagunt canyon and walk up along the river up to Nankoweap beach. Hence the use trail. I only made it to Kwagunt Beach that day as I needed a dry-out of my pack’s content and needed to learn how to get water from the Colorado, which carried a heavy load of sediment, without plugging my filter every few minutes. It paid off that I carry some alum when I hike in Utah and that helped expedite the process.

The Colorado River coming up!

A look back into the Nankoweap drainage

A look downstream from the dune at the mouth of Nankoweap Creek

Nankoweap beach and view East

A view upriver

A view downriver

A look into Kwagunt canyon

Sunset at Kwagunt Beach
According to my hike plan and permit I was now one day behind schedule and I was unsure whether I would be able to make up some time. My next stop was going to be Sixtymile canyon, about a mile upstream of the ferry site where you throw yourself on the mercy of passing rafters for a ride across the river to the left bank.
When you read the section in Mitchell’s and Coronella’s Hayduke guide you get the idea that this hike along the river is an arduous undertaking and it may well be that it was when these two guys first hiked it. Because of the steady use by rafters and Hayduke hikers that went before you, there is now a reasonable use trail along the shore or high above it as dictated by the geography. I did not perceive this trail as being continuous, but I was able to stitch together pieces of it with some bush whacking. The vegetation down there is blood thirsty and exquisitely equipped to draw a meal from you as you pass by, while the cacti are more interested to poke you through your shoes.
In any case, I made good time and was able to push past the Sixtymile canyon that I had planned to camp in onwards to the ferry point. When I had looked at that last mile on Google Earth I had not understood how that was going to go. The rocks appeared to reach all the way to the water’s edge. Where would one be walking? Would one have to climb high and then have to find a way down again? Fear not, it is straightforward. The rock indeed goes all the way to waters edge, but there are lots of ledges to walk on, with tinajas even to get some water if you are lucky. You are walking just a few feet above water level.


Morning on the river

Awatubi Beach


Ledges near the ferry point

Upstream of the confluence of Colorado and Little Colorado
I had estimated that I would have to be at the ferry point by about 11 AM if I wanted to get a ride from a rafting party like the one I had seen taking off from Nankoweap beach. As I was hustling down the ledges I heard voices behind me and there was a raft right there. They had not yet seen me, but when I addressed them, they were happy to come ashore for me to step into their raft. I was offered a beer and we lazily drifted downstream. This party was a private group of friends, one of whom had won the lottery for a slot on her first try. They had planned for a snack break upstream of the confluence with the Little Colorado, an ideal spot for me to get off.
The group beached their rafts and everybody did their own thing for a while. I chatted with an older guy who was an obviously very experienced UT/AZ hiker who had been to many places I had been to and to many I had not even heard of. I was offered more beer and some food and I distributed my prepared thank you note with pictures from some highlights of my hikes in Utah. This was very popular. I have to thank Caroline aka Puppy for the idea.
I was eager to get going as my information suggested that the Beamer trail is not exactly a two miles per hour trail and it is some six miles long. The Little Colorado was not exactly little that day as thunderstorms in Coconino County over the previous days had increased flow considerably. My first attempt was unsuccessful but my second one somewhat higher upstream was successful. The water was hipbelt depth and the walking poles were vibrating as I sidestepped across. I pity the longitudinally challenged!
The Beamer trail runs high above the river at cliff’s edge and in places is quite narrow and exposed. The most difficult sections are when the trail veers inland to cross a wash that drains the cliffs to your left into the river. These washes are just wild and the use trail across them is often convoluted. It does not help that the people who place the cairns apparently majored in Japanese garden design where the objective is to hide the human hand perfectly. The cairns are therefore mostly shy or camouflaged or tiny. You would think that they understand that a shy or camouflaged cairn is a contradiction in terms. A cairn that does not say “I am a cairn and proud of it” has failed to do its job. So you get cairns of the type “pigeon egg on top of chicken egg one top of goose egg” and they are extremely difficult to see in this wild mess of rocks of all sizes and colors that fill these drainages. So, oddly, it was the sections that had no significant exposure that slowed me down the most and the stretches paralleling the river allowed me to progress more quickly.


On the Beamer trail just past the confluence (top) and further downstream (bottom)

Crossing a drainage

View from Beamer trail downstream


A look up the drainage that I camped in late in the afternoon
In the end I camped in a dryfall some 1.5 miles upstream of the spot where the Beamer trail descends to the river’s edge. I came upon a tinaja filled with good water and my motivation to push on evaporated as my water needs had been met unexpectedly.
Next morning I continued down Beamer trail, reached the river’s edge and found a sort of lagoon filled with clear rather than murky river water which made water purification a lot easier. As a rule filtration of straight river water took about four times as long as the same quantity of non-murky feed water requires. In other words, looking for decent feed water pays off nicely in terms of time savings.
I made my way along the left bank to Cardenas creek where I camped. The path is often not super clear but if you follow your intuition you will hit the use trail again. For the most part the strip of terrain that you can walk on between the cliffs to your left and the river on the right is not that wide. It is more the question of how much winding your way through the vegetation you have to do. Since this vegetation is bloodthirsty, paying attention and choosing your path carefully pays off. There was fascinating light show at Cardenas that night and I thoroughly enjoyed myself as the sun set.


Early morning on the Beamer trail

Pool party at clear lagoon stream side


Sunset at Cardenas Beach
From Cardenas you find your way up the Escalante trail, far away and above the river, climbing some 1500 ft. You then find your way to Seventyfive-Mile canyon where halfway up I lost the trail and the cairns despite my best efforts. I eventually found my own way down a dirt and talus slope to a dryfall that I could climb. Unexpectedly there was another dryfall below that I could not climb, but I saw some game tracks and they showed me the way to a ledge that I could use to bypass the dryfall. How fun! I was now in the canyon and headed down canyon when I saw that another dryfall appeared to be coming up. My stomach clenched. I was off trail and the trail that i had lost earlier might lead to an entry into the canyon below the dryfall. Would I find a way down? In the end it was dead easy, the dryfall was about 15 feet, but made of rock that one could climb easily with the pack on. Below this dryfall you reach the narrows of this canyon that is deeply entrenched. You reach the river easily without any additional acrobatics.


On Escalante trail

River below Unkar rapids. Notice debris field in river at bottom left


Dryfall at top of Seventy-five Mile Canyon

Narrows in Seventy-five Mile Canyon
I reached the beach where a rafting party had landed and I was wined and dined. I wolfed down two bowls of chili that nobody among the rafters was interested in and had some ice-cold beers. It was heterogeneous group of people, but I had some good conversations with some of them. A very pleasant evening.
Next morning I continued downstream past Pagano canyon, which will bear revisiting in the future, and down “the chute” which took my breath away standing at the top until I perceived the faint use trail leading through this jumble of rocks. Looks terrifying from on top but really is pretty much a nothingburger once you start moving down and find your way into the very steep and narrow middle section. Once past that you can walk out to the left and descend a talus slope right next to the left wall.

Pagano Canyon dryfall

View across river from Pagano canyon


"The chute" from below

View upstream from just upstream of Red Canyon

The 19th century Hance asbestos mine across the river
Once past this obstacle you walk on water’s edge on a narrow strip of land between the cliffs and the water. I reached and passed Red Canyon and then continued along the river to Mineral canyon where I made my way up Tonto trail across the river from the Hance asbestos mine. It is a long but fairly easy walk with a gentle continuous slope on ledges. You walk out every side drainage, a geographic illustration of fractals, until you reach the dry Hance Creek stream bed which you cross. As before this is is just a jumble of rocks and you have to poke around to find the entrance to the continuing trail on the west side of the creek bed. This trail splits and there is signage so that you continue on the correct leg (left) starting to climb steeply in yet another drainage. The trail crosses another dry stream bed and right there is the last camping opportunity, the last bit of flat terrain before you top out on Horseshoe Mesa where you are not allowed to camp. I took shelter there for a little while to wait out a rain front moving though and then continued on in order to reach Page spring. I reached the spring when it was already very dark. The trail is steep, narrow and partially washed out. The rules state that you are not allowed to camp within 200 feet of the spring but I decided that it was going to be easier to ask for forgiveness than to find a legal spot. I spent an uncomfortable night, but luckily a dry night above the spring on a narrow ledge.

View into Mineral canyon. Somewhere up there is the South Rim

A view back to the right bank from deep inside Hance canyon

A rain front approaching. It was going to reach me 30 min later
Next morning I pushed up to the top of Horseshoe Mesa along an elaborately built trail with some wash-outs past some ancient mines. You then get a brief break as you head over to the Grandview Trail and then another relentless climb over convoluted terrain commences. Shortly before you reach the top there is a stretch of a sort of cobblestone pavement, steep and covered in sand which makes the trail slippery. Not my favorite, but I realize that the park has to stabilize the trail somehow as it winds through a sandy slope.
And then you see people and they ask you all sorts of questions as to where you come from and whether they should go down. I had a longer conversation with a Belgian couple, dairy farmers it turned out speaking more than passable English having a vacation in the US and making the rounds of the National Parks in the Southwest. The farming business must be more profitable these days than it used to be in my youth!
I found my cache undisturbed at the junction of the Grandview TH access road and Highway 67 and then made my way along the highway to the visitor center. That walk along the highway for eight mile was rather unpleasant. People driving too fast, passing you too closely and their attention split between driving and trying to catch a glimpse of the canyon. Unsurprisingly nobody offered a ride.
I reached the bus stop at Yaki point and caught the bus to the central transportation hub where I caught another bus to the Backcountry Office where I had my permit adjusted to accommodate a rest day. I then walked to the Mather campground where I stayed for rather cheap on the backpacker’s lot with a whole bunch of Arizona trail hikers. The supermarket and deli is a five minute walk away, rather convenient. I had looked forward to maybe sleeping in a real bed, but it was the Columbus Day holiday weekend, so it was busy and the prices for a hotel amounted to a legalized form of highway robbery.
At 5 AM on the second morning on the South Rim I found myself waiting for the bus to take me to the South Kaibab TH. There were more people with OCD on the bus than I had imagined. Who, after all, gets up at 4:15 to go hiking? It turns catching the sunrise partway down the South Kaibab trail is a thing. The first mile on the trail was rather busy with people hiking by flashlight, but once one got past the point where the sunrise watchers stopped it was not too bad. By no means as solitary as the previous week along the river, but I did not have that expectation anyway. Most people going further were headed for Phantom Ranch and then back up by either the South Kaibab trail or Bright Angel trail.


Sunrise along South Kaibab trail


Along the South Kaibab trail

Corral at Phantom Ranch

Granite Gorge upstream of Bright Angel campground
I took it easy on the way down, rested for a good while at the corral near Phantom Ranch and then again at the bottom of the trail leading up to Clear Creek where I was to camp for the night having not succeeded in securing a camp spot at Bright Angel or Cottonwood campground. The climb to Clear Creek is fully exposed to the sun and constitutes a 1500 ft climb. Camping is allowed only past the 2 mile mark along that trail. The camp location is not particularly attractive, there is no shade from either sun or wind, but beggars can’t be choosers so I made do.


Along North Kaibab Trail
Next morning I got an early start as soon as the light allowed walking without headlamp and headed down to the North Kaibab trail. This is a gentle affair at first along Bright Angel Creek on good, typical NP trail. This lasts more or less until you reach the Ribbon Falls area where the slope increases dramatically. My favorite thing to gripe about made its appearance there: the steps on the trail with a step height well above one foot. They bother me and I always wonder how shorter people and kids deal with this nuisance. Must be exhausting!
Once past the Manzanita rest house where I had lunch in welcome shade, the trail becomes even more steep and the sights are breathtaking. You really do not see where the trail is heading unless you catch the sight of people walking higher up and when you do you think “How in hell do they get me up there in this short distance?” There are well constructed switchbacks and lots of them that allow you to gain altitude. You cross a bridge, climb some more and reach the Supai tunnel that you pass through. There is a small rest area there and a fountain with drinking water. Mule rides from the North rim stop and take off from there. For the rest of the hike you deal with mule shit and piss with the associated stench until you step out at a parking lot on top, after having climbed some 5.5k ft. What a day!
I headed over to the Backcountry Office and talked about continuing on with a very enthusiastic ranger. I was encouraged by what he had to say and went on to the hiker and biker lot at the campground where I found a small band of AZT hikers camping out. This lot is at the very end of the campground near the drop-off into the canyon. It was rather windy and cold (altitude 8.4 k ft) and the wind was going to mess with me all night. For weight reasons I had left my tent at Nankoweap TH and only carried a flat tarp. Not ideal in a campsite that offered no shelter from the wind. In fact in the middle of the night I had to get up and turn my tarp around 180 degrees as I would otherwise be sleeping in a wind tunnel after the wind had changed directions in mid-night. But I heard some of the tent campers get up and out to restake their tents as well, so I am not sure that I would have faired better had I had the Aeon Li with me instead of the tarp.
Next morning I started the long road walk through the North Kaibab forest towards Swamp Ridge Rd. Given the temperatures and the wind I chose to camp about a mile from my cache located near the junction of BLM roads 223 and 268. The location offered some brush to break the wind and thus the night was merely freezing cold, but at least not windy.


Along Swamp Ridge Rd

View into Muav canyon from Swamp Point

View into Saddle canyon from Swamp Point
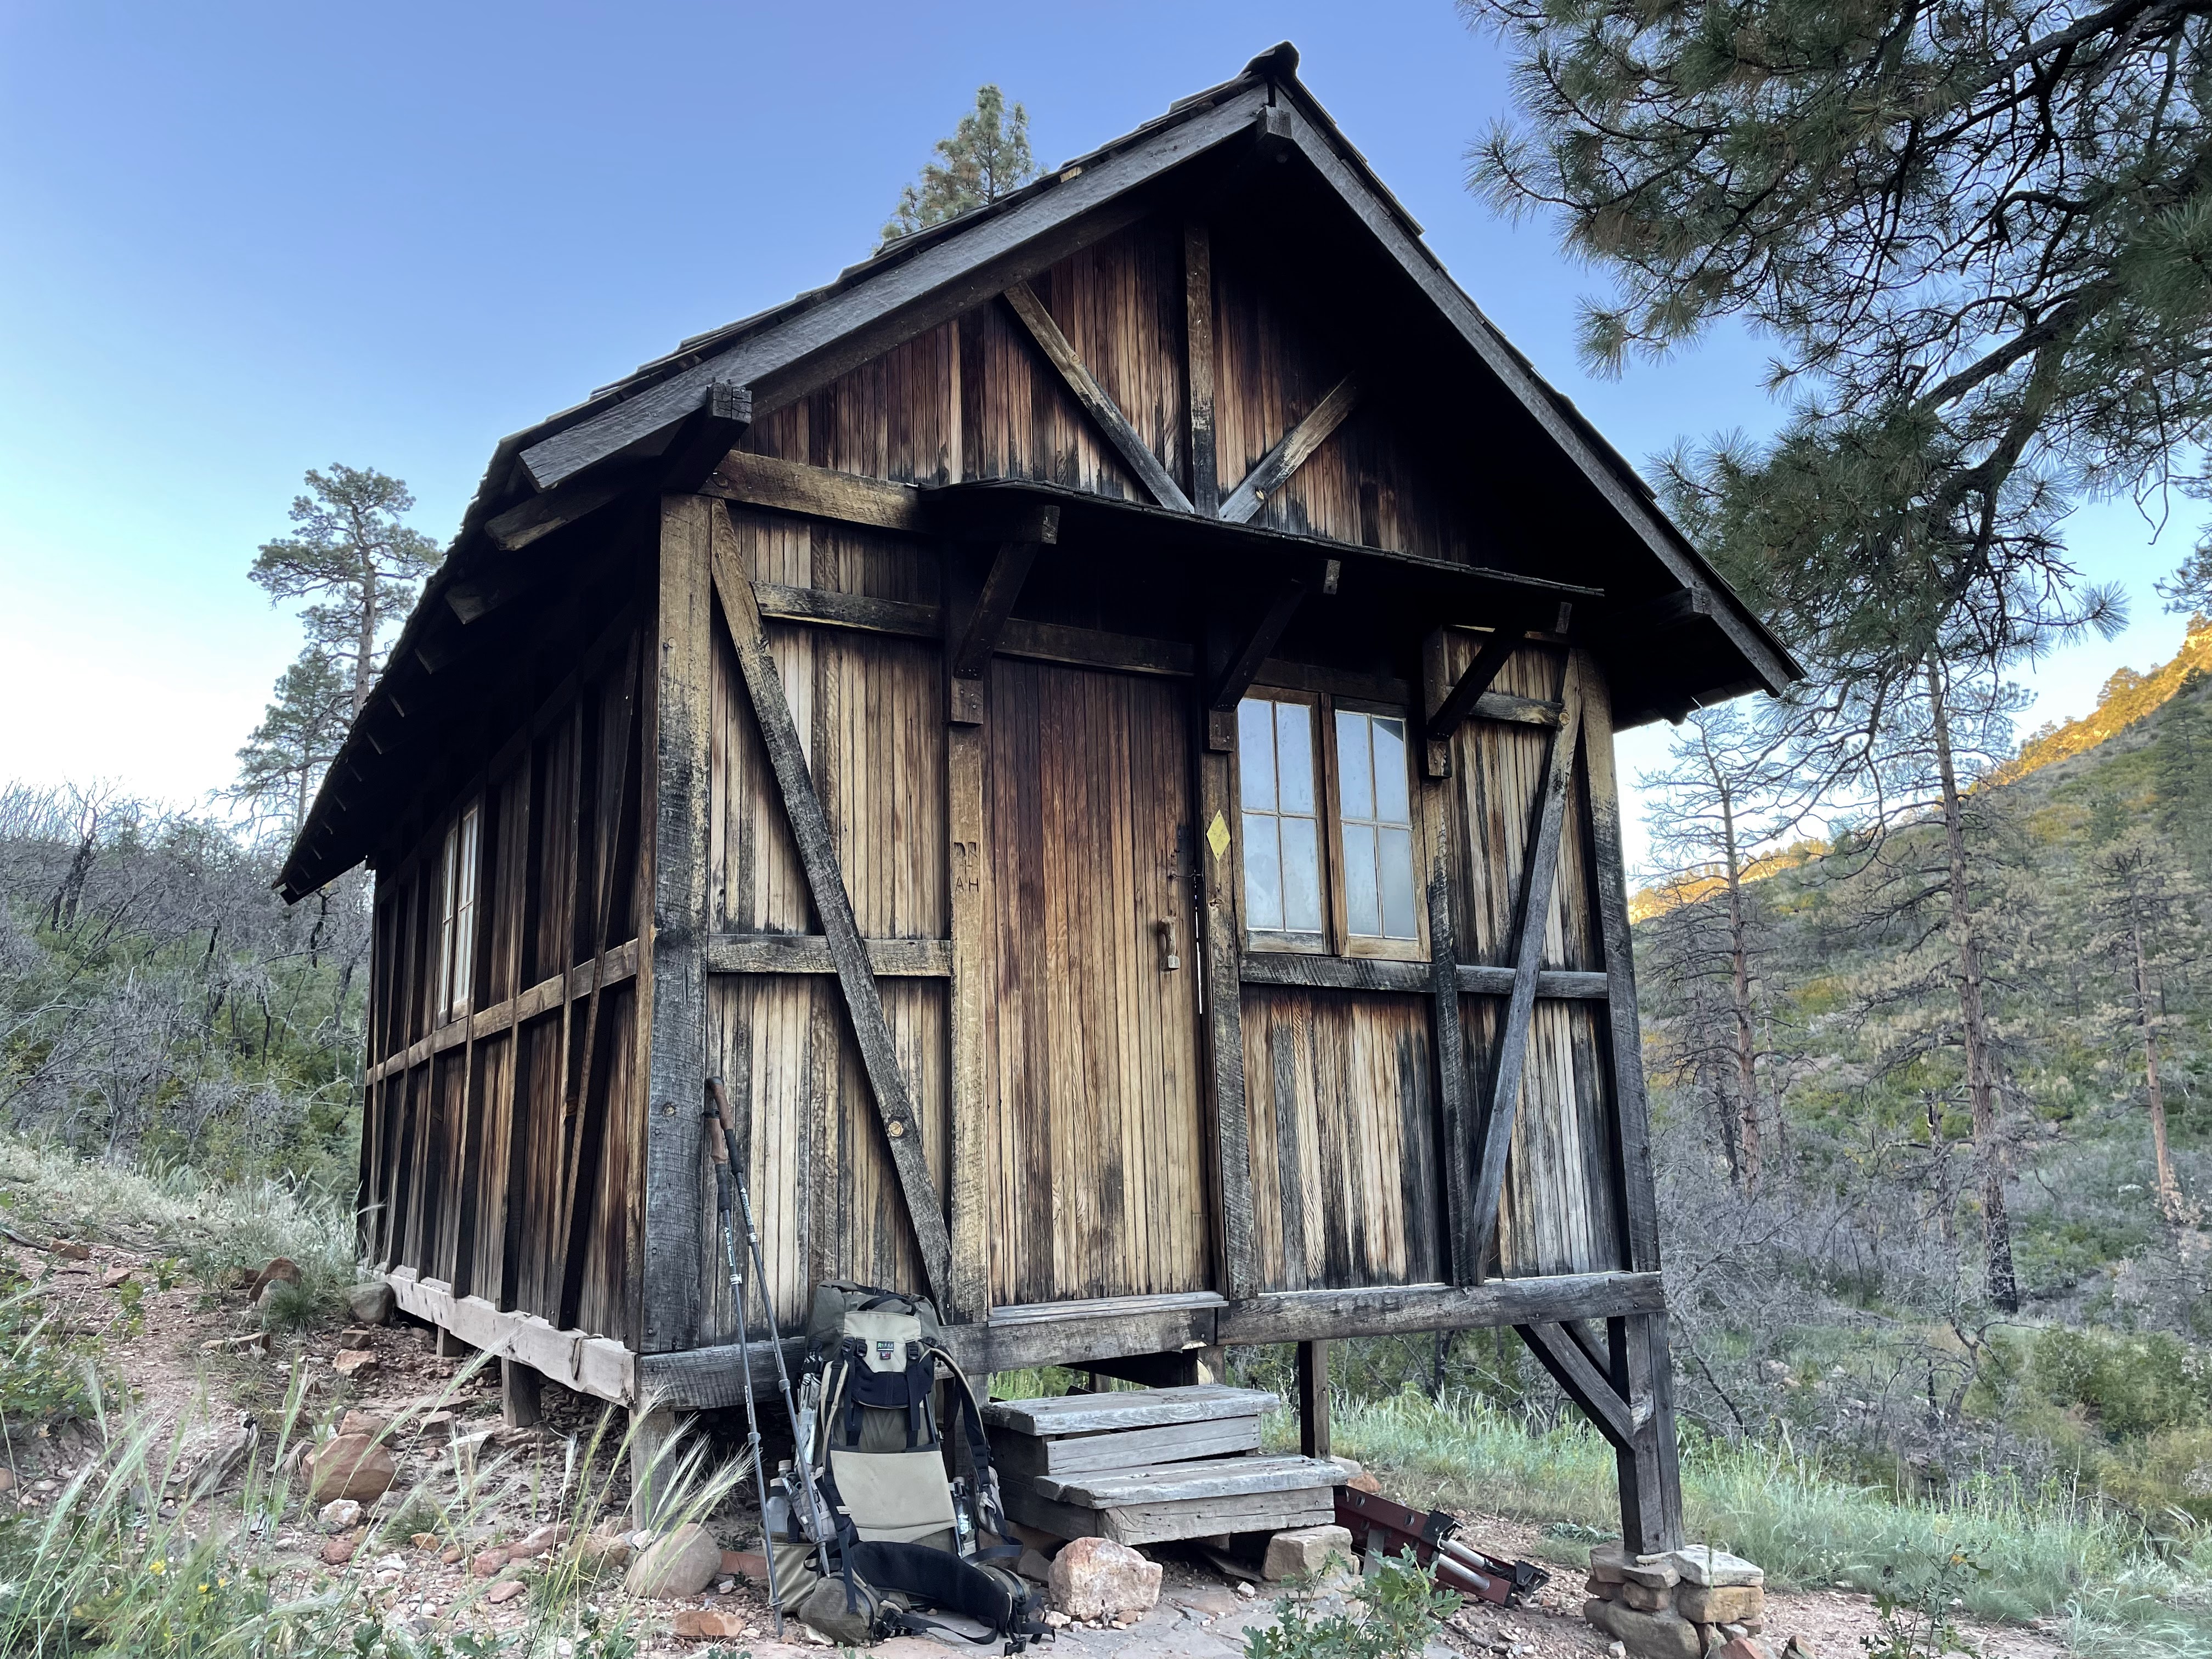 Roosevelt cabin on Muav Saddle
Next morning I found my cache, dumped some gear, got a lot of water and my last set of food. Then returned the way I had come and walked along Swamp Ridge road. Easy walking, no traffic, not a soul around. The aspen were turning, Fall had arrived. Beautiful views into Saddle canyon from Swamp point and into Muav canyon. I descended to Muav Saddle to the Roosevelt cabin, collected water from a seep along the North Bass trail, cooked dinner and slept in the cabin. That place is a bit noisy when the wind rattles the wooden shingles on the roof. Several people have described it as spooky.
And then it was time to tackle Saddle canyon. Much ink has been spilled about it and I will add some as well. Early reports talk about a harrowing descent through a jungle of brush with long thorns. Rest easy, there has been a fire a few years back and that brush has gone up in smoke. There is a lot of scrub oak that will poke you with relatively blunt dead branches but you won’t be scratched up, yet. Eventually you end up in a drainage that you can follow relatively easily and then abruptly you find yourself atop the 150 ft dryfall that you have find your way around. This particular location has originated its own folklore as some people have had a harrowing experience, I am thinking in particular of Carrot Quinn’s report.
I have to say that I only knew that you were to climb up to the first cliff band. And I found that to be dead easy. You climb down a minor dryfall above the 150 ft one, you walk along a ledge on the left (LDC) and then step onto the slope. I explored two alternatives, a low one that did not go and a high one that did. Follow a dirt slope for about 30 yards and go higher by about 8 ft when you have the opportunity. You’ll be walking at the foot of a cliff and after another 30 yards there is another opportunity to go higher. Take it and head for an alcove in the next higher cliff. Head over there, turn a corner to the left and you see ahead of you exactly where you have to go. There are even some cairns. Once a top the ridge which I christened Tequila Ridge for all the agave up there, head for the tip pointing NW. I descended the slope to the left (W) and then contoured to a small saddle with a SE/NW axis. From there you can look into the abyss to your right and then you make your way down a drainage on the left side into the drainage below. There is a significant cairn down there so that you are assured that at least one other idiot thought that this was the way to go! Stay in the drainage and make your way through rubble until the drainage narrows and shortly thereafter you enter a kind of crypt where the water had undercut the bedrock and you can’t see the sky. Right there is the first plunge pool, guarded by a choke stone on top. You can step onto a bench on the left and lower your pack. You slither roast the choke stone and before you know it you have slid down the limestone ramp into the pool below. Refreshing!

Minor dryfall above 150 ft dryfall

View into the abyss of the 150 ft dryfall

Entry into the bypass right by the rocks in the sun

Saddle canyon narrows

First plunge pool from below. Notice chokestone on top
Continuing on you make your way through a rather narrow slot canyon with some pools that you can walk around until you come to a dryfall, about 10 ft in height. I lowered my pack and found a way to slide down thinking “I hope I don’t have to get up this thing!” Which of course I had to because 50 yards on there is another, taller dryfall that I did not think I could get down. While scratching my head as to what to do I saw a cairn on the right bank further down canyon. So I had missed something, there was a walk around. Now how to get back up the first dryfall? I was lucky. Looking at it from the bottom there was an obvious way of getting up, and down for that matter, that I had not seen from above.


First dryfall from below

Pools in the limestone
Upstream of this dryfall I found a notch in the right bank wall that I climbed up. Good hand and foot holds, but brutal exposure. I could climb out of the notch into the wall above the two dryfalls. Brutal exposure, one slip and you are dead meat. Solid rock, but ledges only half a shoe wide. Look for the bottom cairn and figure out how to get to the altitude that allows you to reach the ramp that the cairn sits on. This is definitely class 4, so take your time and do it without a pack for heaven’s sake.
Once past the dryfalls continue and the first plunge pools in white or grey rock filled with reddish water make their appearance. The first few you can walk around but then comes a set where you have to bite the bullet. I had waterproofed my gear inside my pack and placed the pack itself into a double garbage bag for additional protection. I could push the pack down the slides and it would then float on its side in the pool below. However, the plastic of the garbage bags is not robust enough to withstand the abrasion of the lime stone as the pack slides down the slides. You need a bag that is made of thicker plastic. I suggest you work this out at home where you have more options to acquire the right kind of bag. The hardware stores in the small towns in Utah only have the standard stuff.
I got thoroughly soaked when I slid down the slides myself, but the water levels were not particularly deep, the geology does not allow that as the pools are connected by the slides so there is an objective upper limit as to how much water can be in the pools. The longitudinally challenged may rely on that. For me the deepest it got was just above hip belt level.


Last and major plunge pool from atop (top) and bottom (bottom
And then the canyon widens and you can delude yourself that you made it through the infamous Saddle canyon. But hold it, not so fast! There is one more giant dryfall at the very bottom that you walk around on the left on a steep trail with more significant exposure. You walk along a narrow trail at the foot of the cliff on your left until you reach a talus slope which you then have to descend. But that also passes, eventually, and you reach the junction with Stina canyon. I camped there, fortuitously having collected some water in one of the clear pools in the stretch of plunge pools. I was completely spent! What a day!

Sheep trail to get around last major dryfall
Next morning I made my way down Tapeats Creek which is dry in its upper reaches and then water suddenly appears. At Tapeats Amphitheater a significant stream enters from the right and from then on you make your way downstream crossing the stream an infinite number of times. There is one very deep pool in a very narrow section of the canyon and you have to climb out to the right (LDC) and head up all the way to the foot of the cliff wall above, probably some 300 ft or more above water level. There are sporadic cairns, but just know that it is easiest to go all the way up. After a minor descent along the wall to your right you end up on a sloping limestone area that is in part brittle and loose. There is exactly one spot indicated by a minute cairn where you can contour off the limestone into a dirt and talus drainage that allows you to get down to stream level. I named this route the Tapeats High Route. It seems more complicated than it ought to be, but my attempts to get past the pool lower down all ended up with me being cliffed out. So bite the bullet and head straight to the top, it’s the most straightforward way to go.
You reach the confluence of Tapeats Creek and Thunder river which also comes in from the right. I found it most easy to cross Tapeats slightly upstream of the confluence, then to cross Thunder river, which has a lot of sound and fury but not all that much water. Looks more dramatic than it is. Once you have crossed Thunder river you see the trail climbing up in switchbacks to the Amphitheater past Thunder spring. Here I ran into Greengrass, a much younger British hiker who was also doing the Hayduke, the first Hayduker in my Fall hike. He was much faster than I am. We had lunch together and then he moved on leaving me in his dust.

Look back into the Tapeats drainage

Thunder River spring. Strange how this bursts forth in an anotherwise bone dry environment
The descent from Amphitheater down to Deer Creek is somewhat tedious and slow as you cross a drainage multiple times that is filled with the customary jumble of rocks of all sizes. Once you are down, though, there is good trail as you walk along and then above the creek as it digs its course into the bed rock. The trail on the ledge is narrow in places and that may make some uncomfortable with the exposure. Since I did not inherit my father’s aversion to exposure I found it all completely straightforward.

Deer Creek digging in. You can see traces of the trail on the right
At some point you step out of the narrows and stand atop an elaborate switchback that gets you down to Deer Creek rapids and beach. Unfortunately there was no rafting party down there that I could persuade to wine and dine me, so part way down I stepped off the fancy trail and stepped onto a faint use trail that leads downstream high above river level. It was getting late and the daylight was fading fast. This led me to hustle and not think carefully. I was almost out of water and I should have collected some from Deer Creek before joining the use trail. I made it down to Doris rapids while hardly being able to see a hand in front of my eyes. Attempts to get water from the river led to me getting stuck in mud as I could not clearly see where I was stepping. I extricated myself from the muck and went to sleep hungry as there was no water to cook with.
Next morning I walked downstream along water’s edge looking for the cairn that indicates that one has to climb up onto a ledge in order to get to Fishtail canyon. Eventually I got clipped out and concluded that I had passed the spot the night before when hiking high above river level rather than at river level. Ironically retracing my steps upstream I saw the cairn at exactly the spot where I had camped the previous night! I must have been so preoccupied with finding a few square feet of flat ground to camp on that I did not see the massive cairn atop a major boulder.

View downriver in early morning

and upriver
 Fishtail rapids
The climb was steep but easy to follow and a short while later, while contouring downstream again, I chanced upon the seep that I had read about but had not had any location information for. It’s in a dryfall and it provides beautifully clear and cold water. I rehydrated, had breakfast and filled all of my bottles as this was likely to be the last water I would be seeing until Kanab Creek.

The seep is at the bottom of this iconic dryfall
Continuing on the ‘trail’ lived up to its reputation of being tedious and slow. I found that, apparently, all the vegetation and all the rocks have a need for a blood meal from a warm-blooded animal as part of their life cycle, just like mosquitoes. I got badly scratched up all over, particularly in the first mile past Fishtail canyon. That to me was the worst mile of these river miles. Further West there are bits of use trail and some small cairns, sometimes high up and sometimes at water’s edge. I reached Kanab canyon after sunset with the last bits of light. I found myself a place to camp, collected some water from Kanab Creek which was extremely slippery, cooked dinner and hit the sack.
While collecting water in the middle of the night I slipped in the creek and promptly lost the cap to the water bottle I was carrying. Shit! Another bottle had escaped from my pack the previous day, so I was down to four liters capacity rather than six. This would need to be addressed, as water is scarce in Upper Kanab and Hack canyons.

At the confluence of Colorado and Kanab Creek

Lower Kanab Creek
Next morning I headed up Kanab canyon. Unsurprisingly, its banks were slippery as recent rains apparently had flooded the canyon and softened up the muck. You have to get through endless gravel beds and over countless large boulders. The closer you get to Showerbath spring, the larger the boulders get, reaching (small) house size. The sights are great as the walls reach up to 500 ft, I’d estimate, above creek level. But you have to stop to gaze lest you stumble.

Undercut in Kanab Canyon

an easy stretch

and a hard one
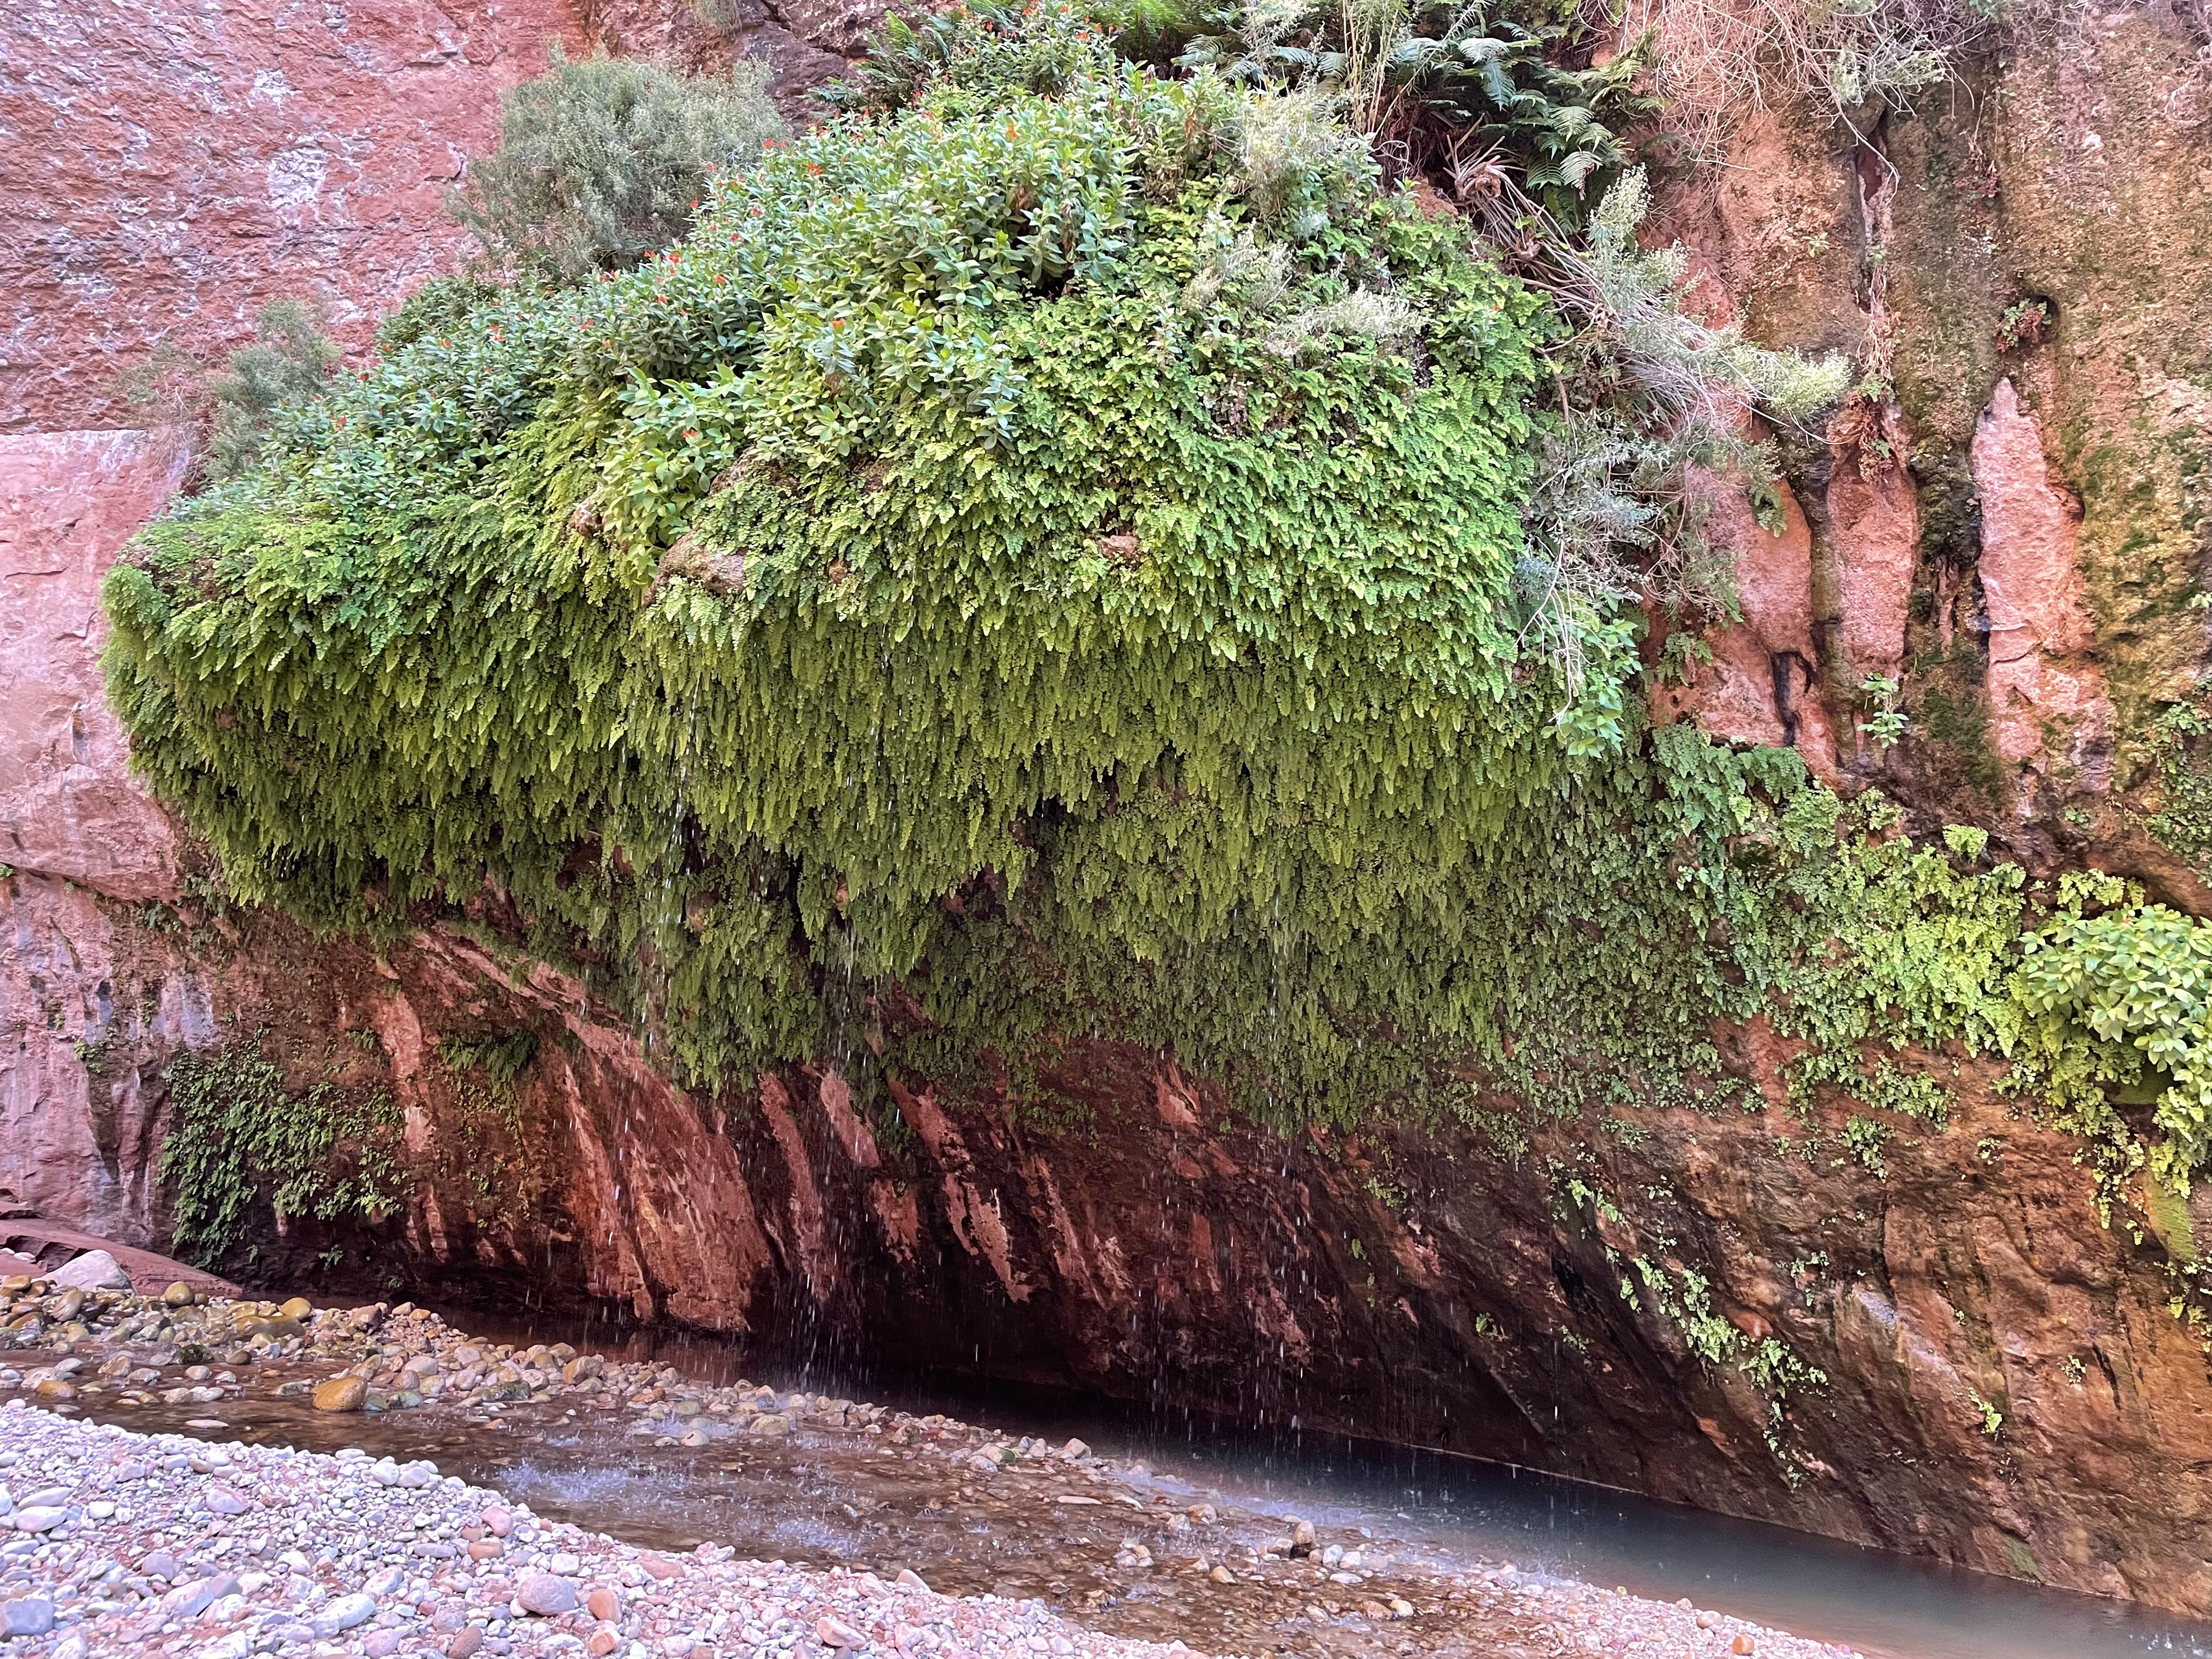
Showerbath spring
I continued to Purple spring, about 1.5 miles beyond Showerbath spring and camped there so that I could get water for cooking, the drinking during the night and for breakfast directly at the source and leave with as much water as I could/was willing to carry. I had come up with a solution for my capless bottle, so I was back to five liters capacity. The walking above Purple spring is not quite as tedious as in lower Kanab, but still tedious enough. Lower Hack canyon is again very tedious until you reach the point near Willow spring where the valley widens and there are more substantial banks either side which, to boot, are marked with impressive cairns. Alas the trail is more of a “trail”.


Hack canyon
I took a bad fall on slick muck that I had not recognized as being slick and wrecked my right foot. It swelled up immediately and was very tender for walking on gravel and talus. I only managed a few miles and then camped in mid-afternoon. Now this was seriously messing with my water plan. My next water would come from Hack reservoir near the road that would take me to Yellowstone spring and ultimately to highway 389. So water conservation was called for.
Next morning the foot was better, but not well. I was going to be limping for the remainder of the trip, but I would be able to finish. I reached Hack reservoir and Mt Trumbull road in extremely late afternoon with one liter of water left. I cooked my last dinner, breakfast was going to be leftovers in the bottom of the food bag.
With fuller light next morning I did not see how to get water out of the Hack reservoir. It was fenced in, consisted of steep mud walls and it was not clear how one would get to water level to retrieve water. I therefore abandoned the plan to head over to Yellowstone spring where I had stashed four liters and instead would be following Mt. Trumbull Rd in the hope of catching a ride from somebody heading to the highway 22 miles away. After a few miles I passed an earthen cow tank and got some water from it. However, the feed water was so murky that it plugged my filter and getting one liter took an hour. While I was getting the water a car passed by. I heard it too late, I ran up to the top of the dam and waved, but they did not see me. It had to work out this way, didn’t it!?
So I continued along the road, cautiously sipping from my one liter to preserve it as long as I could. And no other car came by, in either direction. Rats! As I reached the half-way point and the sun reached its mid-day intensity, it became clear that this was not going to work out. I had maybe 10 oz of water left and still eleven miles to walk. So I sat down by the side of the road with my umbrella and dared the cars in the backcountry to not come out to the highway. I dare you! After about 30 min one guy in the backcountry could no longer stand it and drove out along the road to the highway. He gave me a ride all the way to the gas station on the Paiute reservation by Pipe Spring Natl. Monument. Nice guy, a former river guide who appreciated the hike I had just completed.
I rehydrated at the gas station and then stood on the side of the highway for about an hour with my hitchhiking sign indicating that I wanted a ride to St. George. Eventually a guy from St. George turned around after passing me and gave me a ride all the way to the supermarket in St. George. And with that my hike was done! What an adventure!
Some lessons:
Even
though I have learned from past trips that nothing prepares me for a
hike like making my own maps and waypoints, I could and should have
invested even more time. Had I incorporated altitude profiles into my
preparation, they would have given me a heads-up on what to expect on
Fiftymile Mtn.. I knew or, rather, expected that the level of difficulty
would be going up over the last third of the trip, but I did not fully
act on that expectation during my prep.
While
caching a 1 gal container of water seems like a lot of water when you
place the cache, it is not all that much when you arrive at your cache
in a parched state. The first liter disappears without much of a trace
right away. So, since you are already there, do yourself a favor and
cache 1.5 gallons. It does make a difference! Fourmile canyon corral is
easy to reach from Grosvenor Arch on decent road and caching there is
easy. Caching on Croton road requires an ATV, or so I am told by the
rangers at the Escalante Interagency Center. Not that they have been
anywhere in the backcountry in the past decade or two. the one ranger I
have encountered who actually knows the backcountry is Jean Hall at
Cannonville. that place just has weird opening hours.
Sources I used:
First and foremost, of course, Across Utah by Jamal Green (acrossutah.com/), the guy who turned me on to hiking in Utah. Then the blogs of Carrot Qinn (https://carrotquinn.com/hayduke-route-2016/) (just great writing and, almost uniquely, not glossing over the mental and morale aspects), Carolin AKA Puppy (https://little-package.com/) for the attitude, Thruwego (https://thru.live/) where I learned about the Busch head route out of the Lower Paria and Nic Barth (https://ncbarth.com/Hayduke.htm) for some useful variations (getting through Arches NP, Lockhart basin shortcut) and detail about Busch Head.
Thanks to my home crew, Greg, Wes and Dustin, who monitor my progress and lend support when needed.